- Science Toys
- Magnetism
- Electromagnetism
- Electrochemistry
- Radio
- Thermodynamics
- Aerodynamics
- Light and optics
- Simple laser communicator
- Make your own 3D pictures
- Making permanent rainbows.
- A solar powered marshmallow roaster
- Make a spectroscope from a CD.
- The impossible kaleidoscope
- Make a solar hotdog cooker
- Exploring invisible light
- A high resolution spectrograph.
- Time-lapse photography.
- High speed photography.
- Stacking photos for high depth of field.
- Biology
- Mathematics
- Computers and Electronics
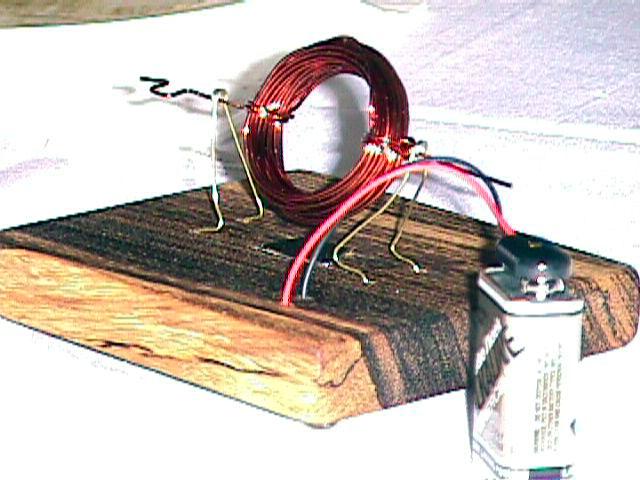
A bigger motor
Our next motor is simply a larger version of the first one, with a base made of wood like this: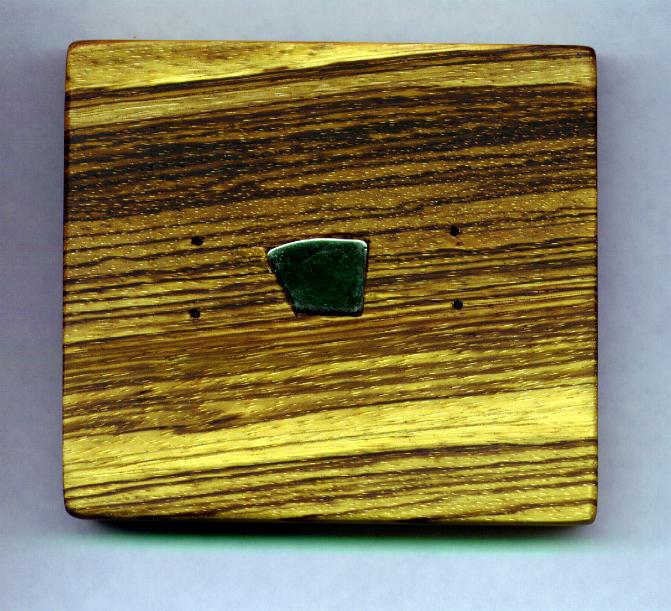 In the middle of the base we have placed the magnet. Around the magnet
we have drilled four small holes for the support wires.
We wind the coil using thick wire (this wire is 20 gauge enameled copper
wire). We use a "D" cell as the coil form:
In the middle of the base we have placed the magnet. Around the magnet
we have drilled four small holes for the support wires.
We wind the coil using thick wire (this wire is 20 gauge enameled copper
wire). We use a "D" cell as the coil form:
 We use brass wire for the supports, and we make all the connections under
the base, so everything looks nice and neat. For a battery connection,
we use a 9 volt battery clip.
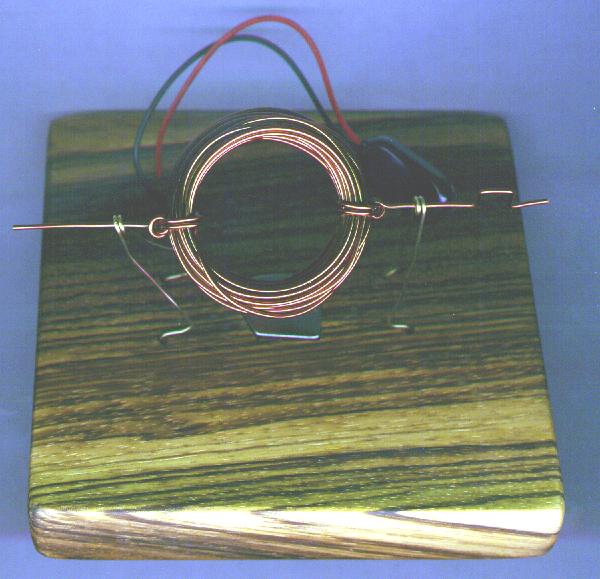
The finished motor looks like this:
We use brass wire for the supports, and we make all the connections under
the base, so everything looks nice and neat. For a battery connection,
we use a 9 volt battery clip.
The finished motor looks like this:
How does it work?
When electricity flows through a coil of wire, the coil becomes an electromagnet. An electromagnet acts just like a regular magnet. It has a north pole and a south pole, and can attract and repel other magnets. Our coil becomes an electromagnet when the bare copper half of the armature wires touch the bare wire of the supports, and electricity flows into the coil. The electromagnet has a north pole which is attracted to the south pole of the regular magnet. It also has a south pole that is repelled by the south pole of the regular magnet. When we scraped off the insulation from the armature wires, we were careful to do it with the coil standing up, and not lying flat on the table. This makes the poles of the electromagnet point to the left and right (as if there was an invisible regular magnet that had the wire wrapped around it). If the coil was flat on the table, the poles would point up and down. Since the poles point left and right, they have to move in order to line up with the magnet at the bottom, whose poles are aligned up and down. So the coil rotates to line up with the magnet. But once the coil is exactly lined up with the magnet, the insulated half of the wire is now touching the supports instead of the bare half. The electricity is cut off, and the coil is no longer an electromagnet. This leaves it free to coast on around until the bare copper can again touch the bare support, and start the whole process over again.A faster motor
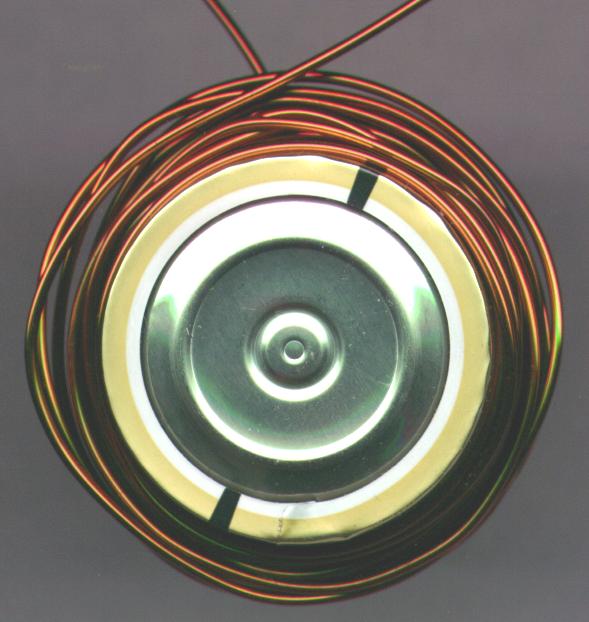
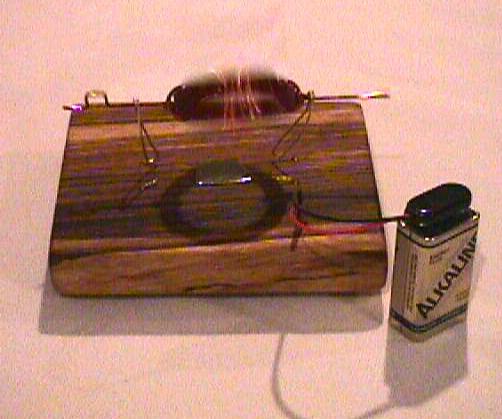
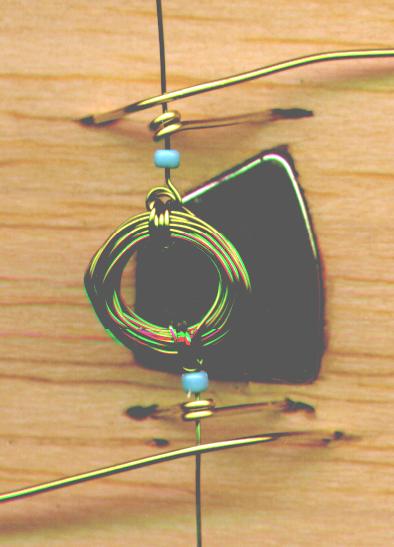
One easy way to make the motor run faster is to add another magnet. Hold a magnet over the top of the motor while it is running. As you move the magnet closer to the spinning coil, one of two things will happen. Either the motor will stop, or it will run faster. Which of these happens will depend on which pole of the magnet you have facing the coil. Make sure you hold the motor down so the magnets will not jump together and crush the little motor! There is another way to speed up the motor. The motor only gets electricity during half of the cycle. During the other half, the insulation blocks the flow of current. This is necessary because once the coil has spun around to face the magnet, if we let the current continue to flow, it will stay stuck there, facing the magnetic pole to which it is attracted. But suppose instead of just stopping the current, we reversed it, so the north pole of the electromagnet became the south pole, and vice versa. The coil would want to flip over again! And since it is already going in one direction, that is the direction it will choose to continue going (due to the inertia and momentum of the coil). Now all we need to do is to figure out how to get the current to reverse, and how to get it to happen at the right time. It turns out to be pretty easy. Place the motor in front of you, so that the axle goes left to right. Now attach a bare wire to the left support, and let it rest on the right axle, just past the right support. Do the same thing with the right support and the left axle. On one half of the cycle, the bare half of the axle will face down and touch the bare wire of the support, just like before. On the other half of the cycle, the bare half of the axle will touch the new wires that are resting on top of the axle. Since these wires are connected to the opposite supports, the current will flow in the opposite direction. The motor will get two kicks per cycle instead of one, and will never be coasting, it will always have power. It will go twice as fast. Below is a photo of a motor built this way. The connections are hidden underneath the base for neatness, but you can see the wires resting on the top of the axles, and know that they are connected to the opposite supports. Below is a closeup view of the same motor. Notice that there are two
tiny glass beads placed on the axles. These beads speed the motor up
even more, as they reduce the friction of the armature against the
supports. Since this reduction in friction balances the extra friction
of the new wires, the motor still goes about twice as fast as the older,
simpler motor.
Below is a closeup view of the same motor. Notice that there are two
tiny glass beads placed on the axles. These beads speed the motor up
even more, as they reduce the friction of the armature against the
supports. Since this reduction in friction balances the extra friction
of the new wires, the motor still goes about twice as fast as the older,
simpler motor.
 Next:
A 10 minute motor with no magnet.
For more information on electromagnetism, see the
Recommended Reading
section.
Order super magnets
here.
Del.icio.us
Next:
A 10 minute motor with no magnet.
For more information on electromagnetism, see the
Recommended Reading
section.
Order super magnets
here.
Del.icio.us
- Science Toys
- Magnetism
- Electromagnetism
- Electrochemistry
- Radio
- Thermodynamics
- Aerodynamics
- Light and optics
- Simple laser communicator
- Make your own 3D pictures
- Making permanent rainbows.
- A solar powered marshmallow roaster
- Make a spectroscope from a CD.
- The impossible kaleidoscope
- Make a solar hotdog cooker
- Exploring invisible light
- A high resolution spectrograph.
- Time-lapse photography.
- High speed photography.
- Stacking photos for high depth of field.
- Biology
- Mathematics
- Computers and Electronics
Some of my other web sites:

Send mail to Simon Quellen Field via sfield@scitoys.com