- Science Toys
- Magnetism
- Electromagnetism
- Electrochemistry
- Radio
- Thermodynamics
- Aerodynamics
- Light and optics
- Simple laser communicator
- Make your own 3D pictures
- Making permanent rainbows.
- A solar powered marshmallow roaster
- Make a spectroscope from a CD.
- The impossible kaleidoscope
- Make a solar hotdog cooker
- Exploring invisible light
- A high resolution spectrograph.
- Time-lapse photography.
- High speed photography.
- Stacking photos for high depth of field.
- Biology
- Mathematics
- Computers and Electronics
Photography through a microscope
Amateur microscopes and cheap cameras
A simple toy microscope and a disposable camera can team up to make stunning photographs of very tiny things. The technique is simplicity itself. You simply focus the microscope carefully by eye as you would normally do. Then you place the camera lens right up against the eyepiece, and snap the picture.
[Click on photo for larger picture] The results are suprisingly good.
Basswood (Tilia) stem, 4x objective.
[Click on photo for larger picture] These photos were taken with an $8.00 disposable camera. While the camera's optics are clearly not designed to compete with expensive cameras, the images hold up to close examination, as you can see if you click on the image to get a large view.

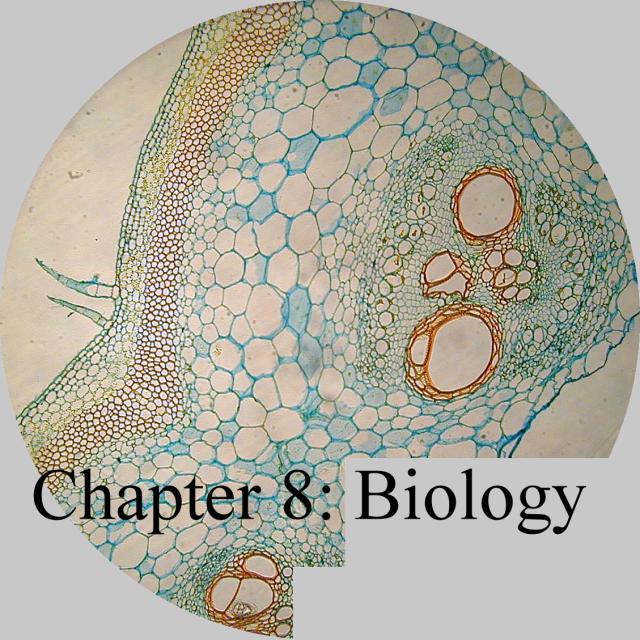
Basswood (Tilia) stem, 10x objective.
[Click on photo for larger picture] The main drawback to the disposable camera is the fixed focus. Later we will see the results of using a camera that can adjust the focus to take sharper pictures. But the better camera costs 100 times as much as the disposable (although a $100 dollar camera would probably take excellent pictures).
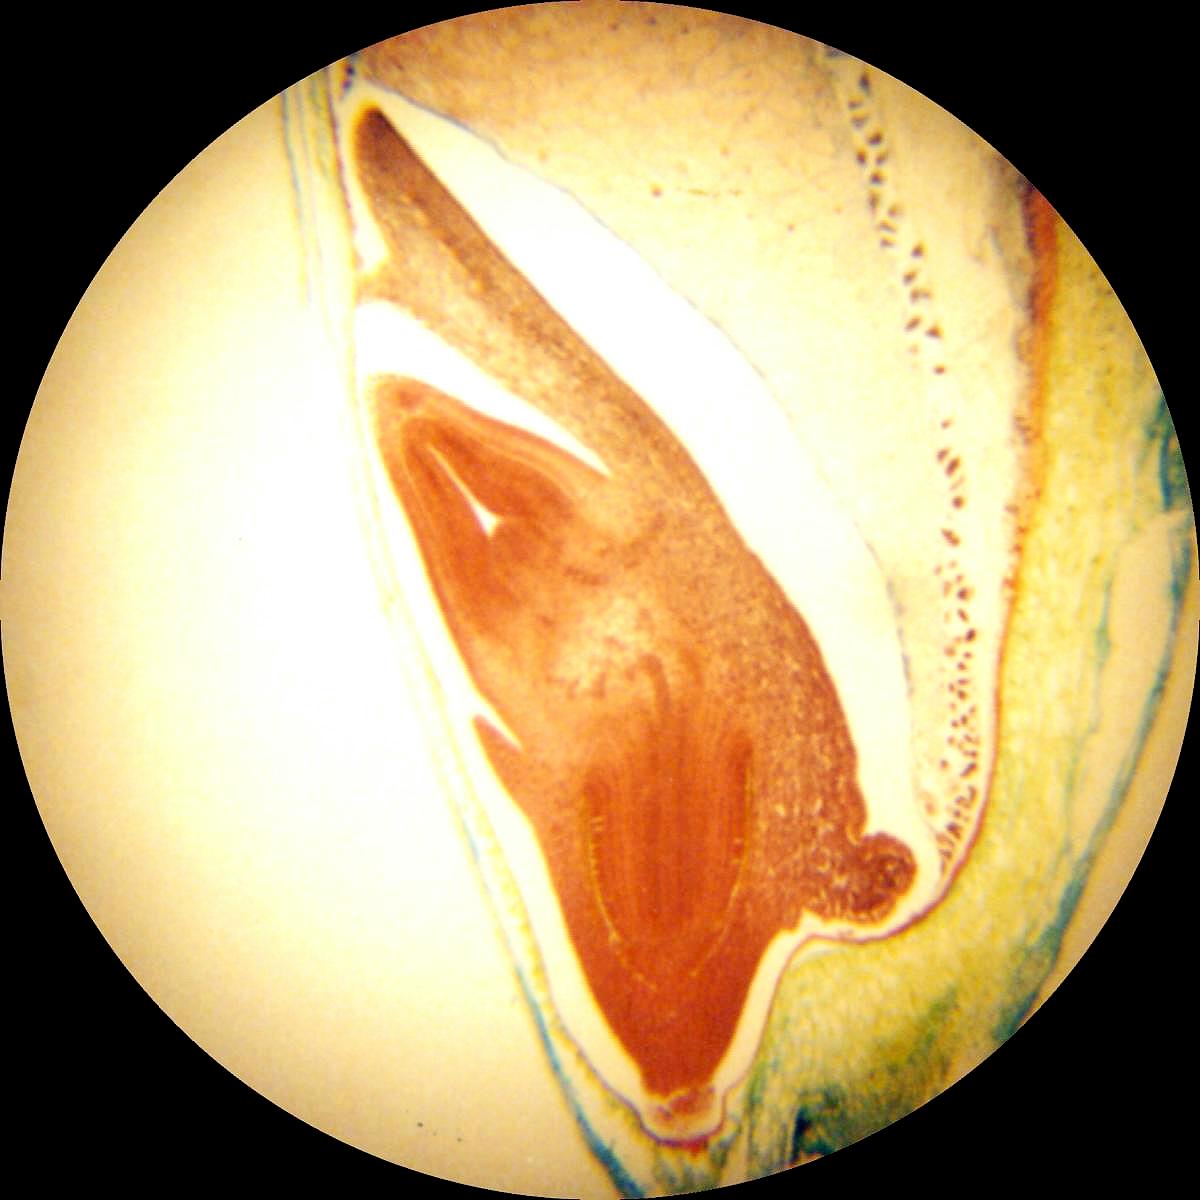
Wheat kernel, 4x objective.
[Click on photo for larger picture] The photos were developed normally, and scanned using an inexpensive color scanner (about $40.00).
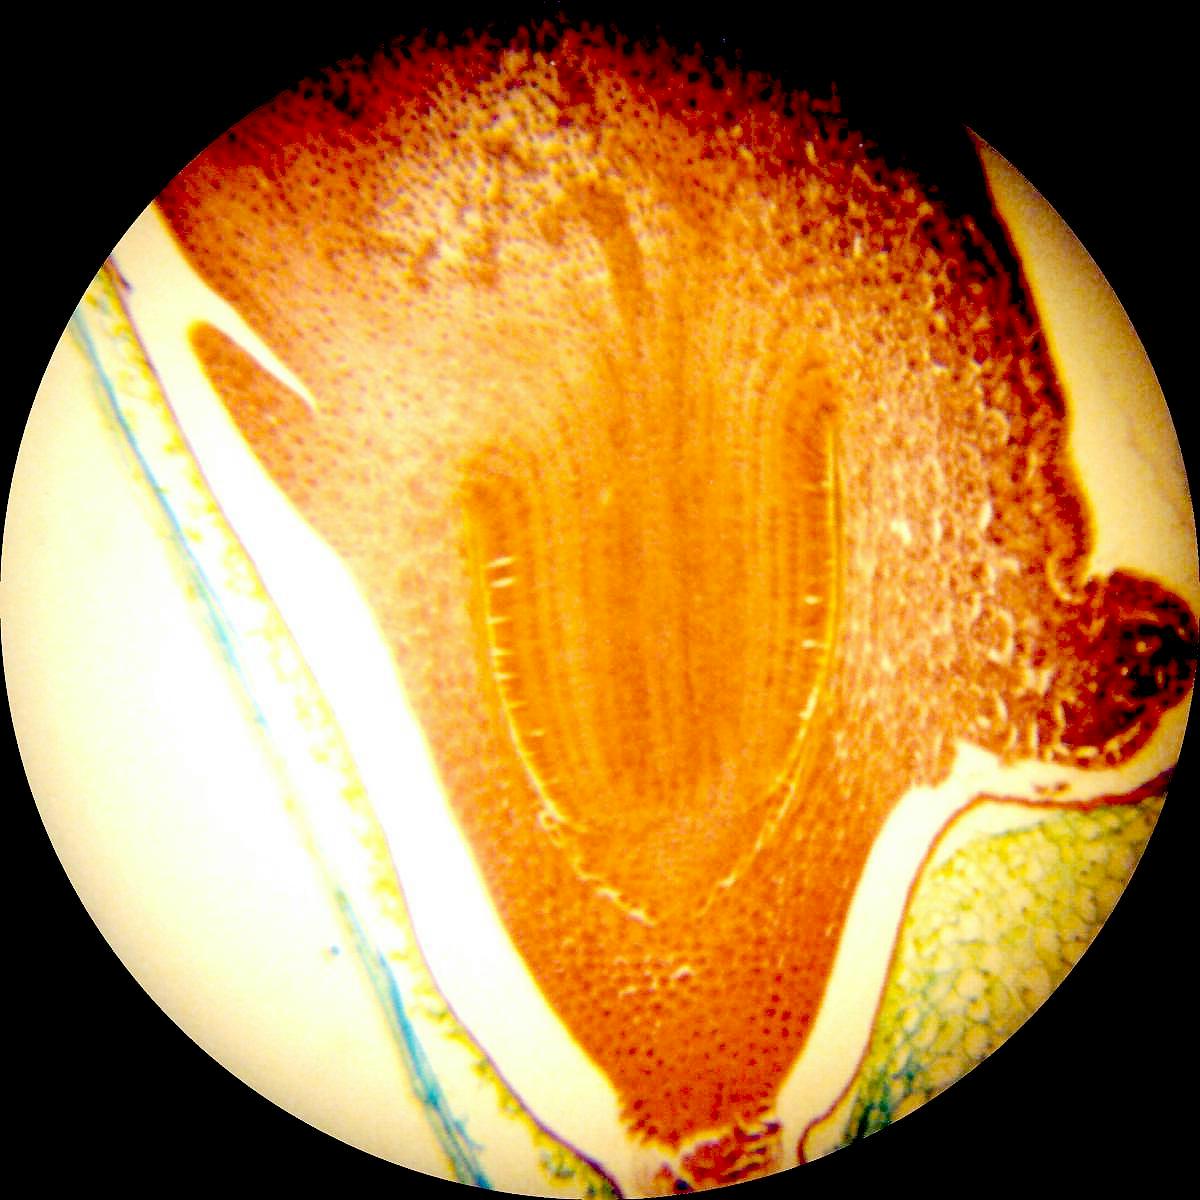
Wheat kernel, 10x objective.
[Click on photo for larger picture]
Wheat kernel, 40x objective.
[Click on photo for larger picture]
A selection of microscopes
The microscope shown in the photo below is an inexpensive microscope of the type commonly sold to amateurs like us. It has no optics under the stage except a concave mirror. It has three objective lenses, and a single eyepiece, for magnifications of 40 times, 100 times, and 400 times. This one is made by a company called Labo, and I think I paid about $100.00 for it.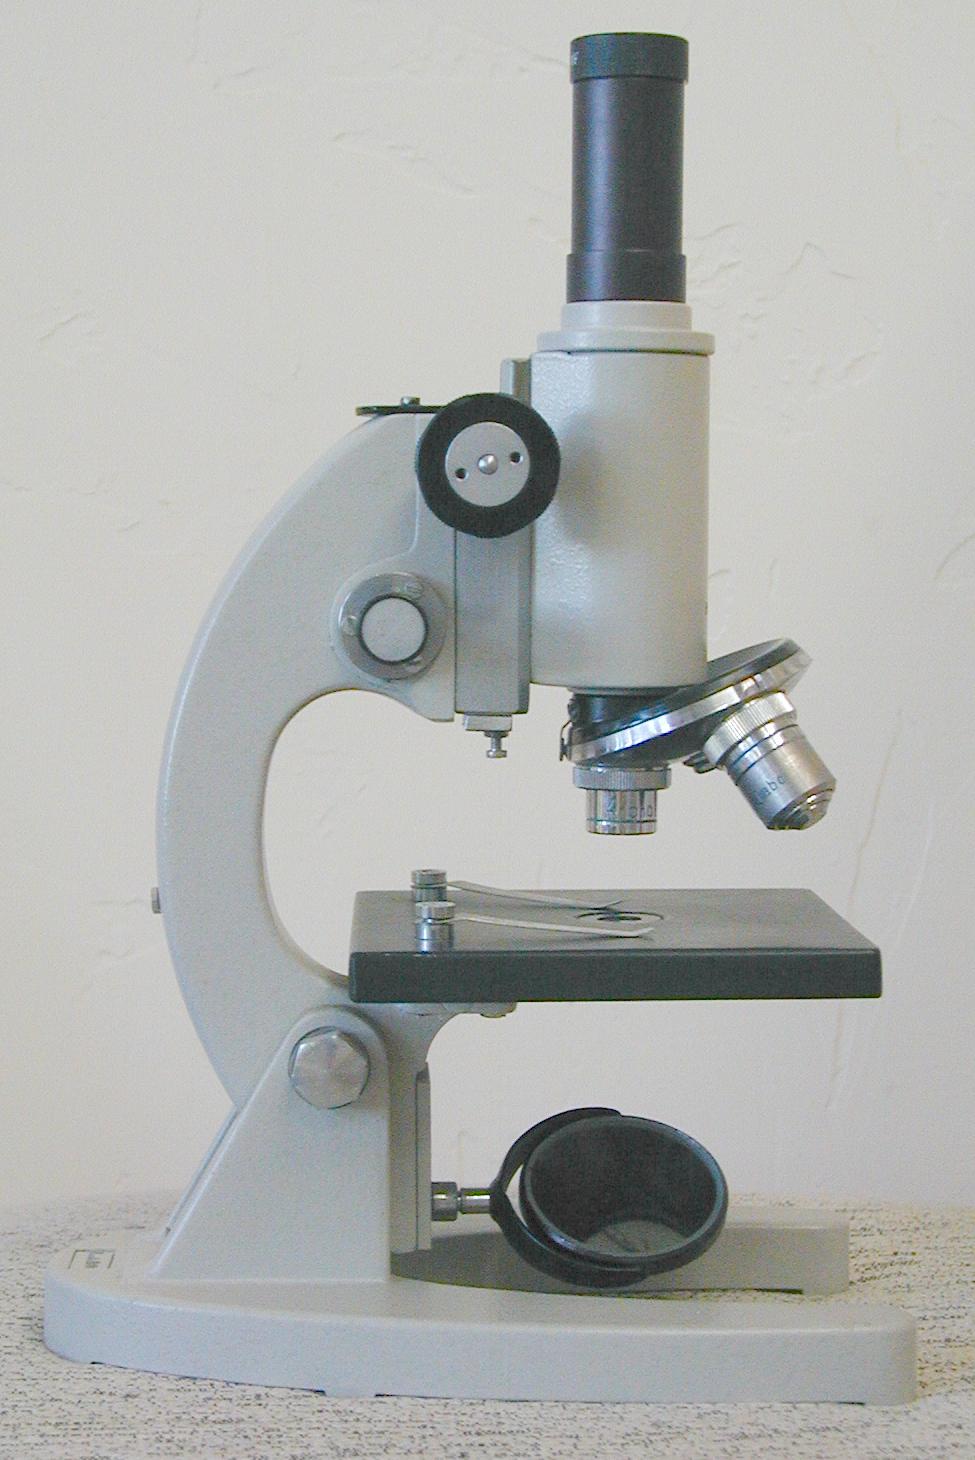
[Click on photo for larger picture] Better microscopes give better results. The next step up is a microscope with a substage condenser. The microscope shown below is made by Eagle, and is about $300. It has several important improvements. Below the stage where you place the slide, there is a large lens system called a condenser. This system of lenses focuses the light onto the specimen.
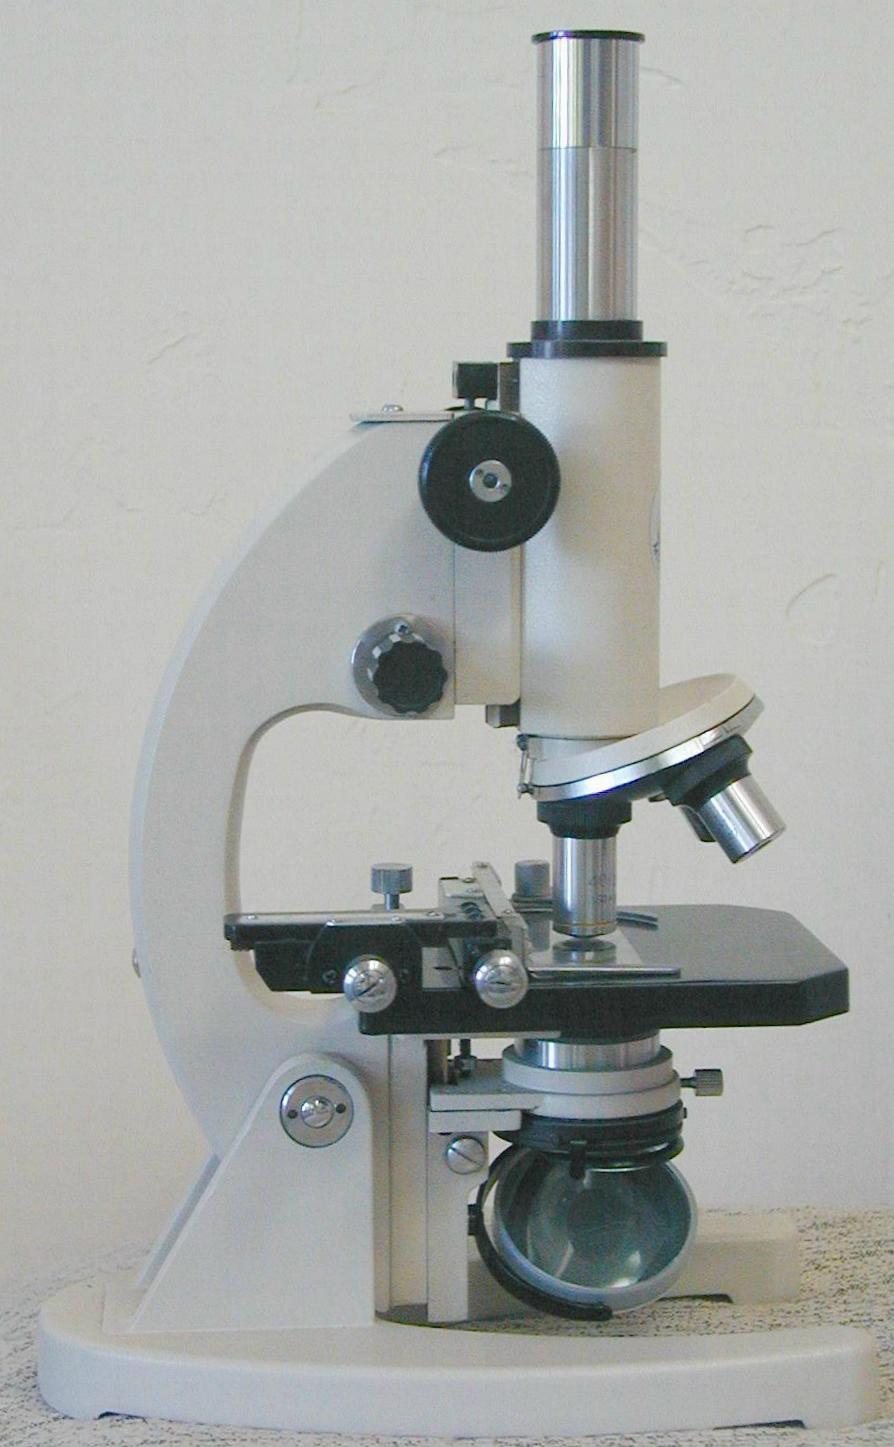
[Click on photo for larger picture] A substage condenser makes the images sharper, and allows more control of the illumination. We will discuss how it works later. In addition to the condenser, this microscope has a mechanical stage. This is a device for holding the slide that allows the operator to turn two knobs to smoothly move the slide left and right,or up and down. Lastly, this microscope has interchangeable eyepieces, so the operator has a choice of a wide field of view, or a closeup of the subject. This feature is not as important as the substage condenser, since a higher power eyepiece will not show more detail (to do that you use a higher power objective lens). It is like blowing up a photograph. It makes it easier to see some parts of the image, but you don't get more information. The next step up in amateur microscopes is shown below.

[Click on photo for larger picture] This is the Celestron Research Microscope, and it sells for about $700. The Celestron adds binocular eyepieces, an illumination lamp, and an oil immersion objective lens that allows 1000 times and 1500 times magnifications. Professional microscopes add features such as phase contrast, differential interference contrast, laser scanning confocal imaging systems, epi-fluorescence microscopy, and other features that greatly enhance the ability to see structures and features of very small things. Some manufacturers of these microscopes are Nikon and Carl Zeiss. In general, these microscopes have prices a little beyond the range of the normal amateur.
Using digital cameras
Disposable cameras are nice because they are cheap, and they have small lenses that make it possible to simply aim them down the eyepiece and snap a picture. More expensive cameras generally have larger diameter lenses, making life more complicated. The lenses must be shielded from light getting in around the eyepiece, and usually some sort of macro lens must be used to make the eyepiece fill the photo. The more expensive Single Lens Reflex cameras have an advantage, however, in that they have through the lens viewfinders, so you can see exactly what the picture will look like before you click the shutter release. The problem with film cameras though, is that you must wait to have the film developed. With digital cameras, you can get immediate results. Many inexpensive digital cameras have small lenses that are a good match to the size of the eyepiece of the microscope, and they often have electronic viewfinders that show you exactly what the camera sees as you take the picture. One digital camera I like to use for microphotography is the Camedia 2020 from Olympus (or its big brother the 3030). The Camedia takes pictures of reasonable resolution (1600 pixels by 1200 pixels for the 2020, and 2048 by 1536 for the 3030). They also can take short movies, which we will experiment with later.Some digital photomicrographs
The photos below were taken with the Camedia 2020, in high resolution mode (1600 by 1200 pixels). The pictures were cropped to eliminate much of the black border around the eyepiece.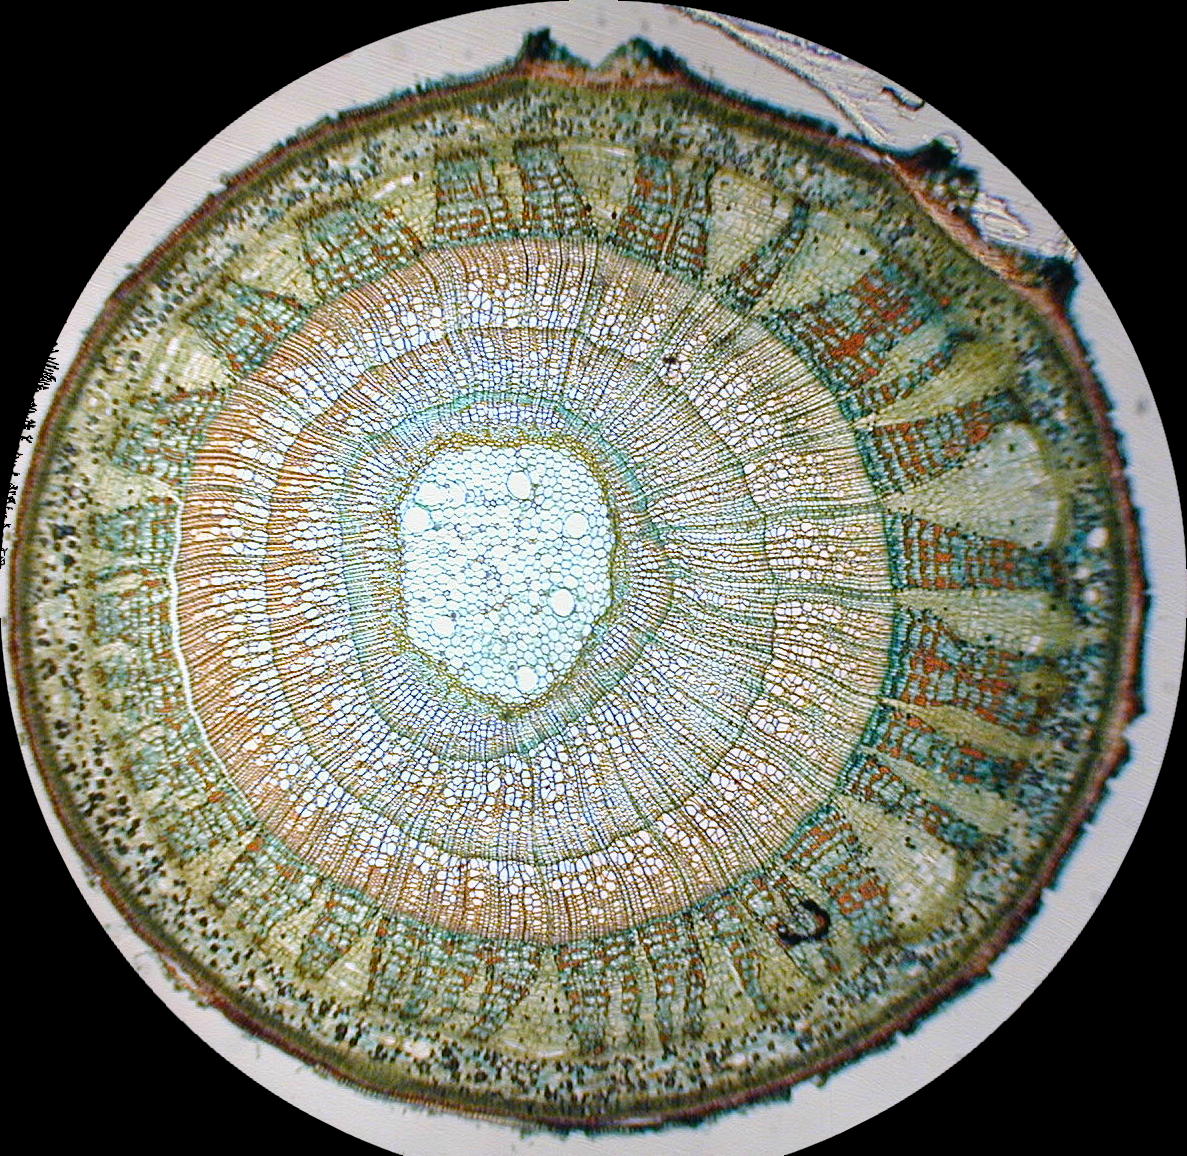
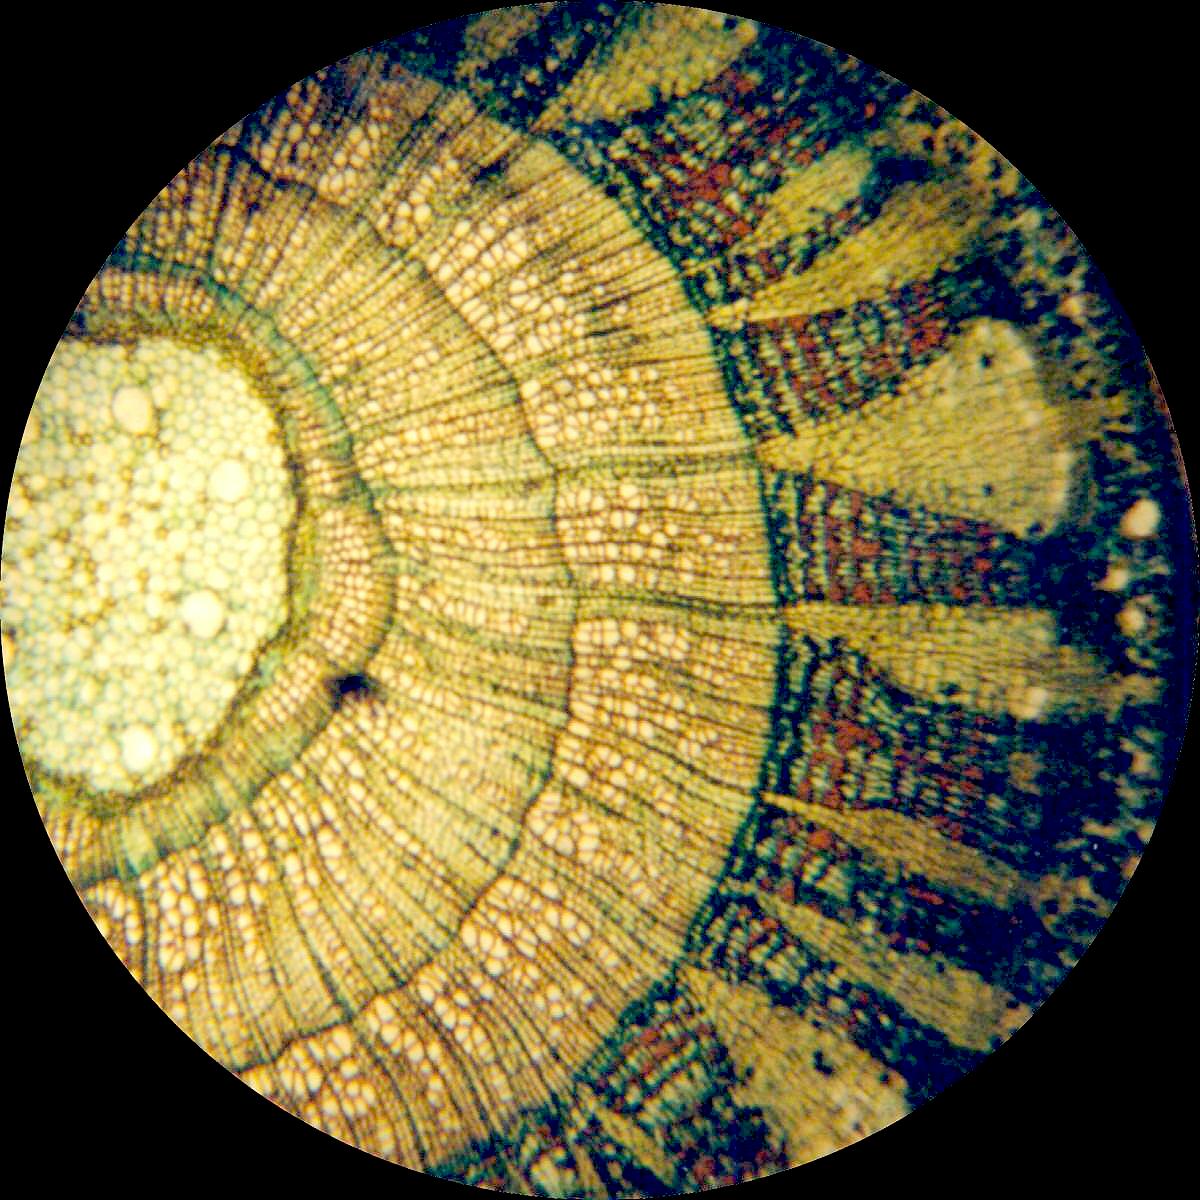
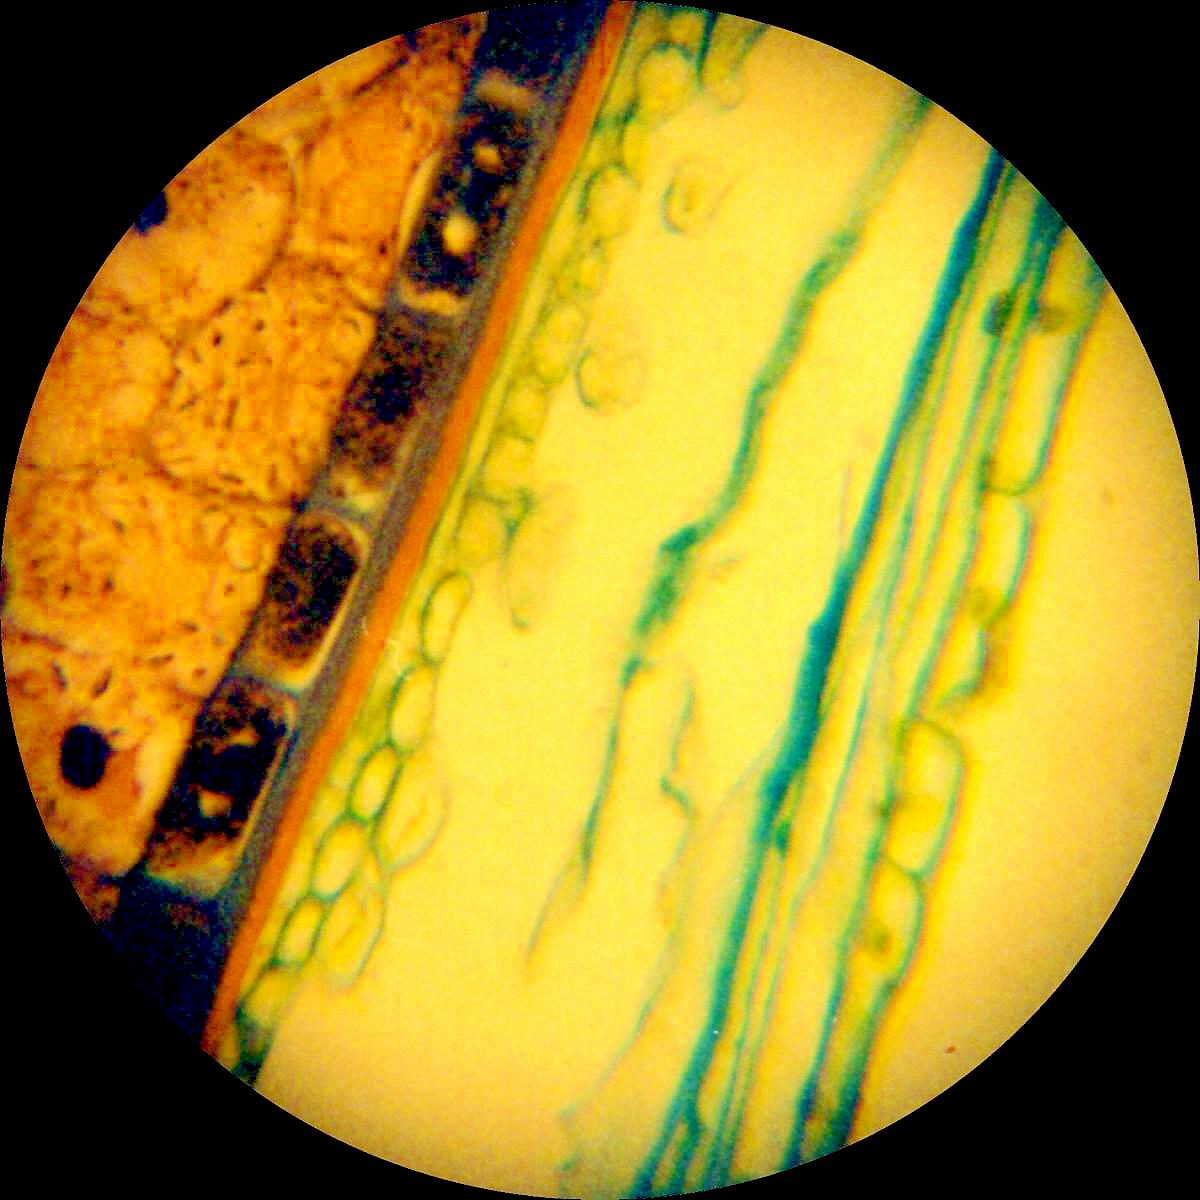
Basswood (Tilia) stem, sectioned and stained, 4x objective.
[Click on photo for larger picture]
Same slide, 10x objective.
[Click on photo for larger picture]
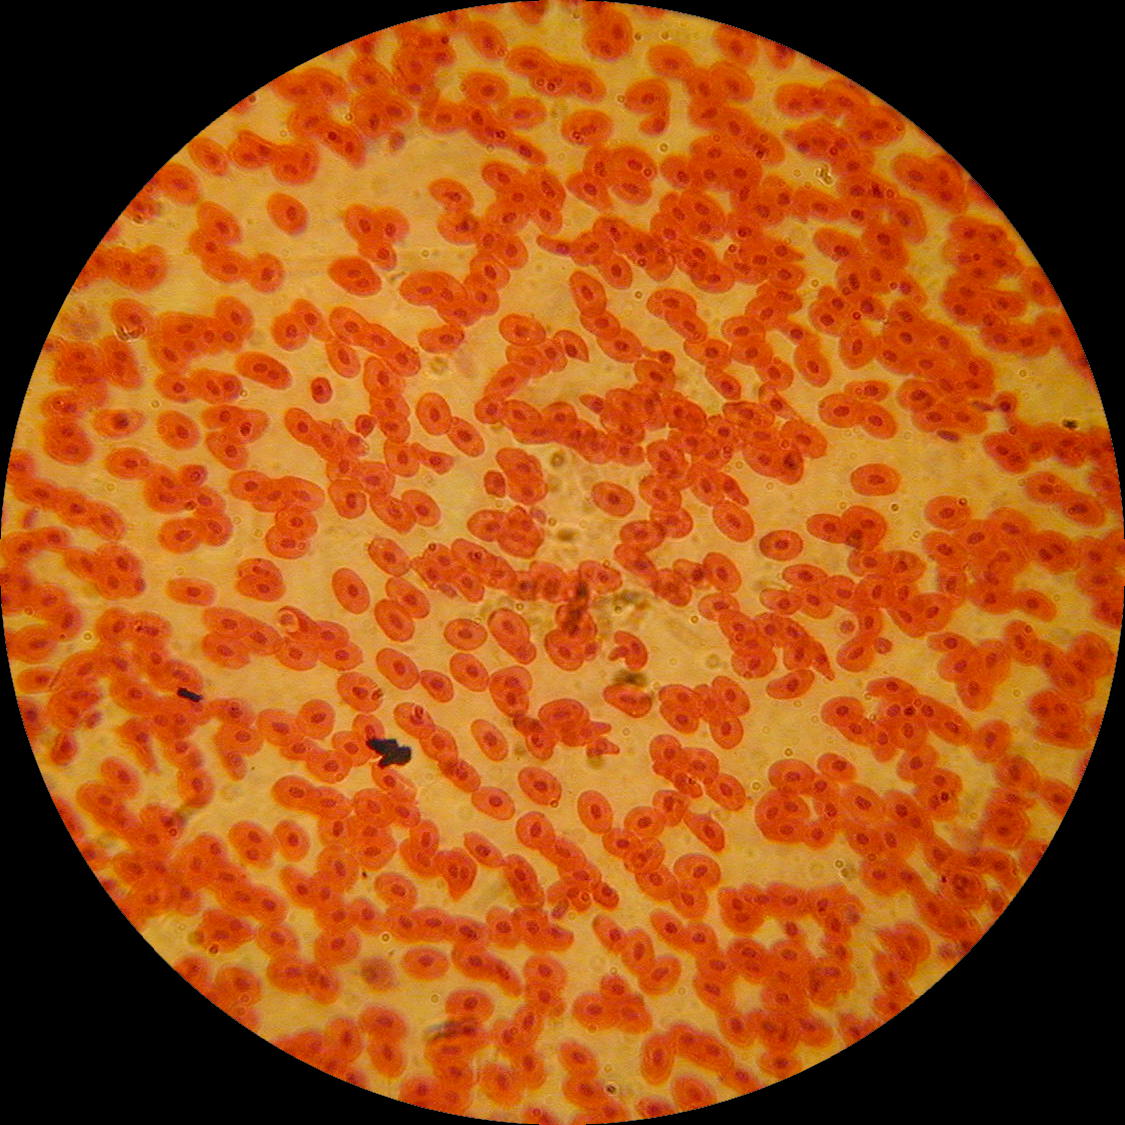
Frog blood, 40x objective.
[Click on photo for larger picture]
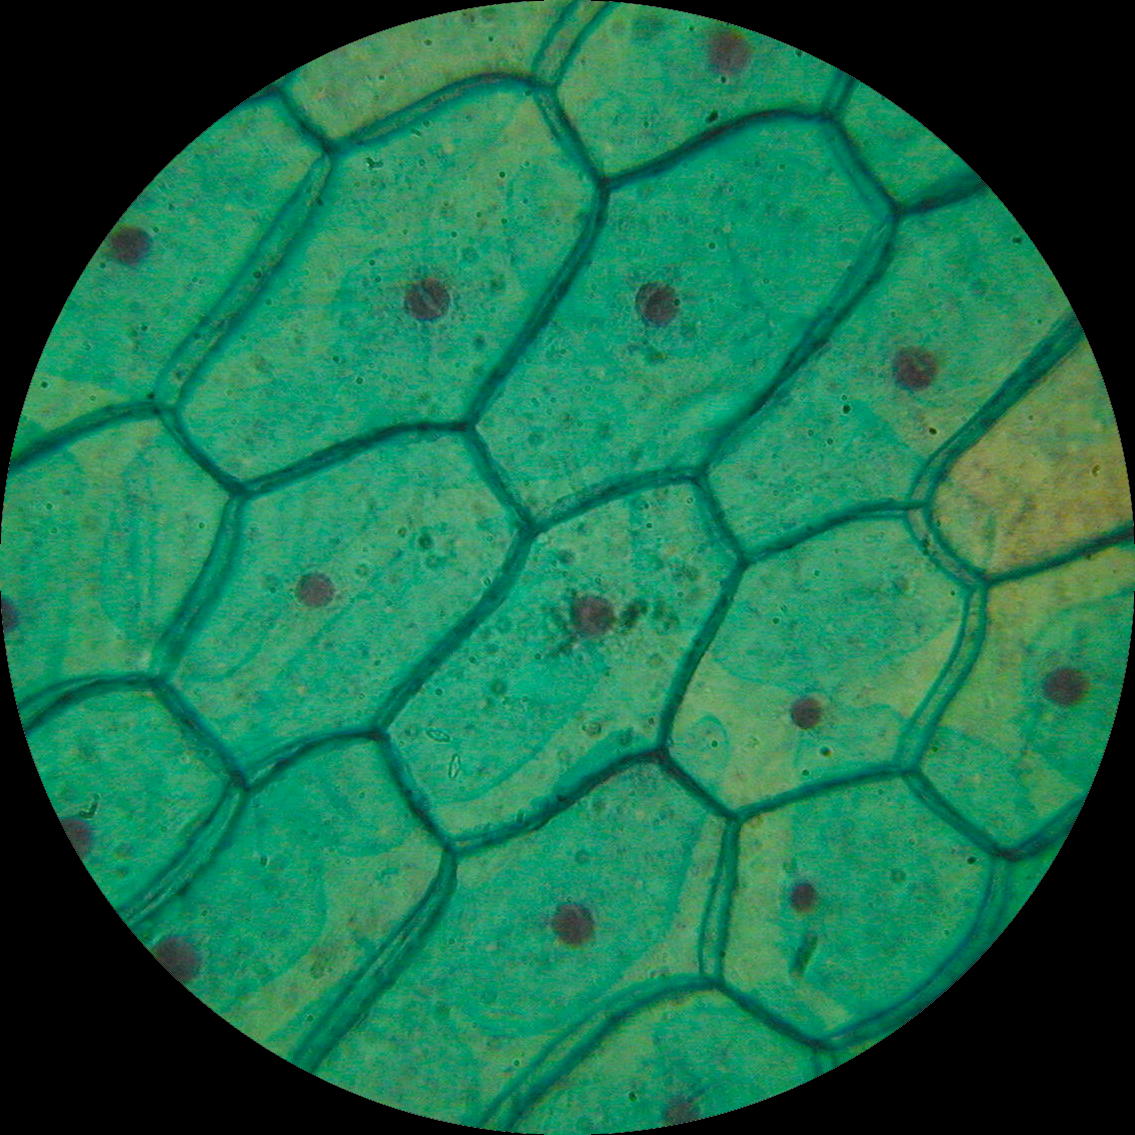
Onion skin, 10x objective.
[Click on photo for larger picture]
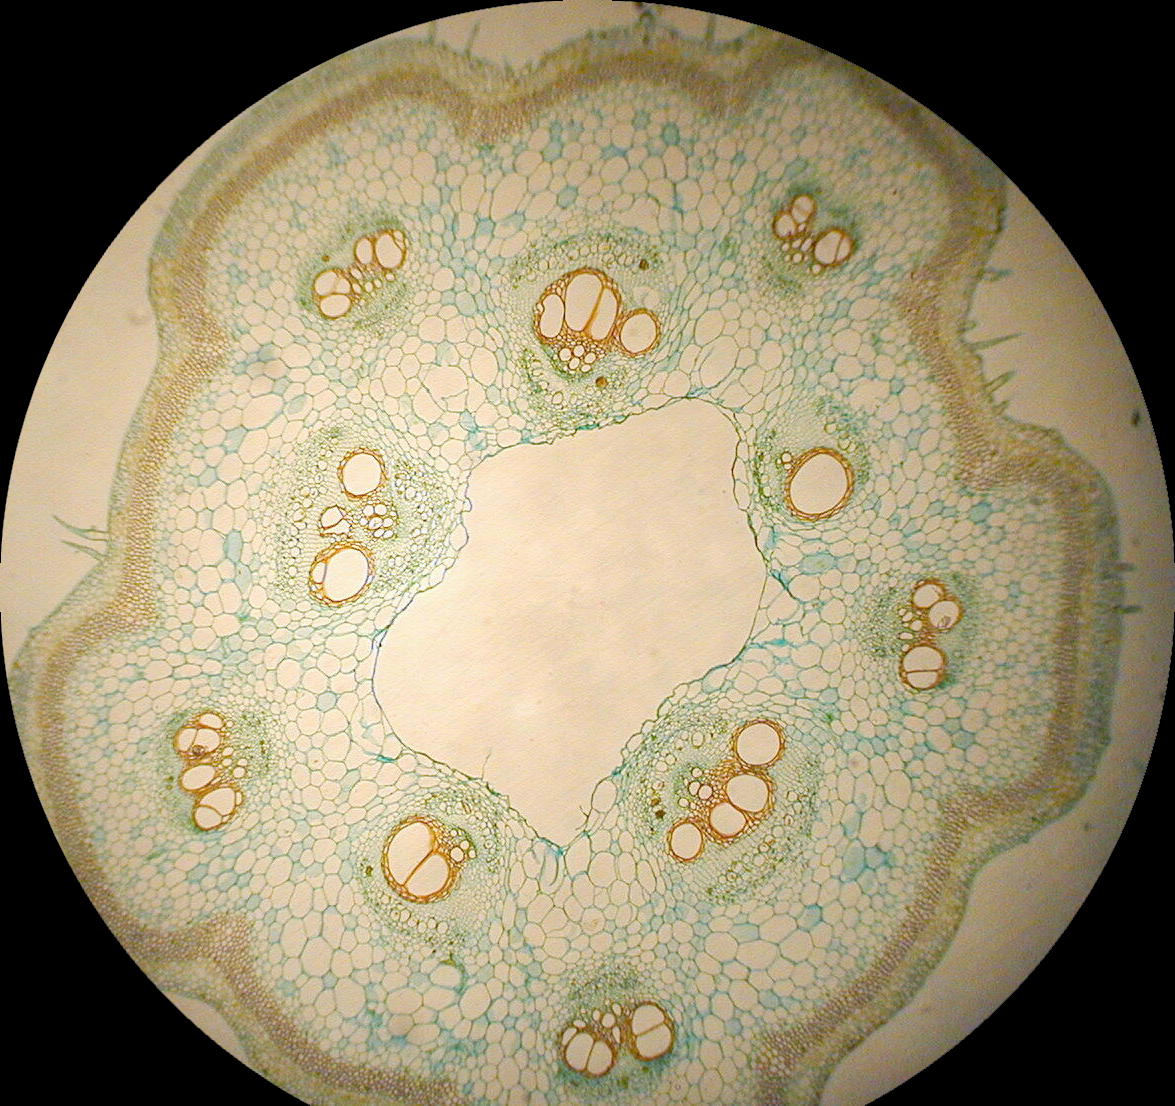
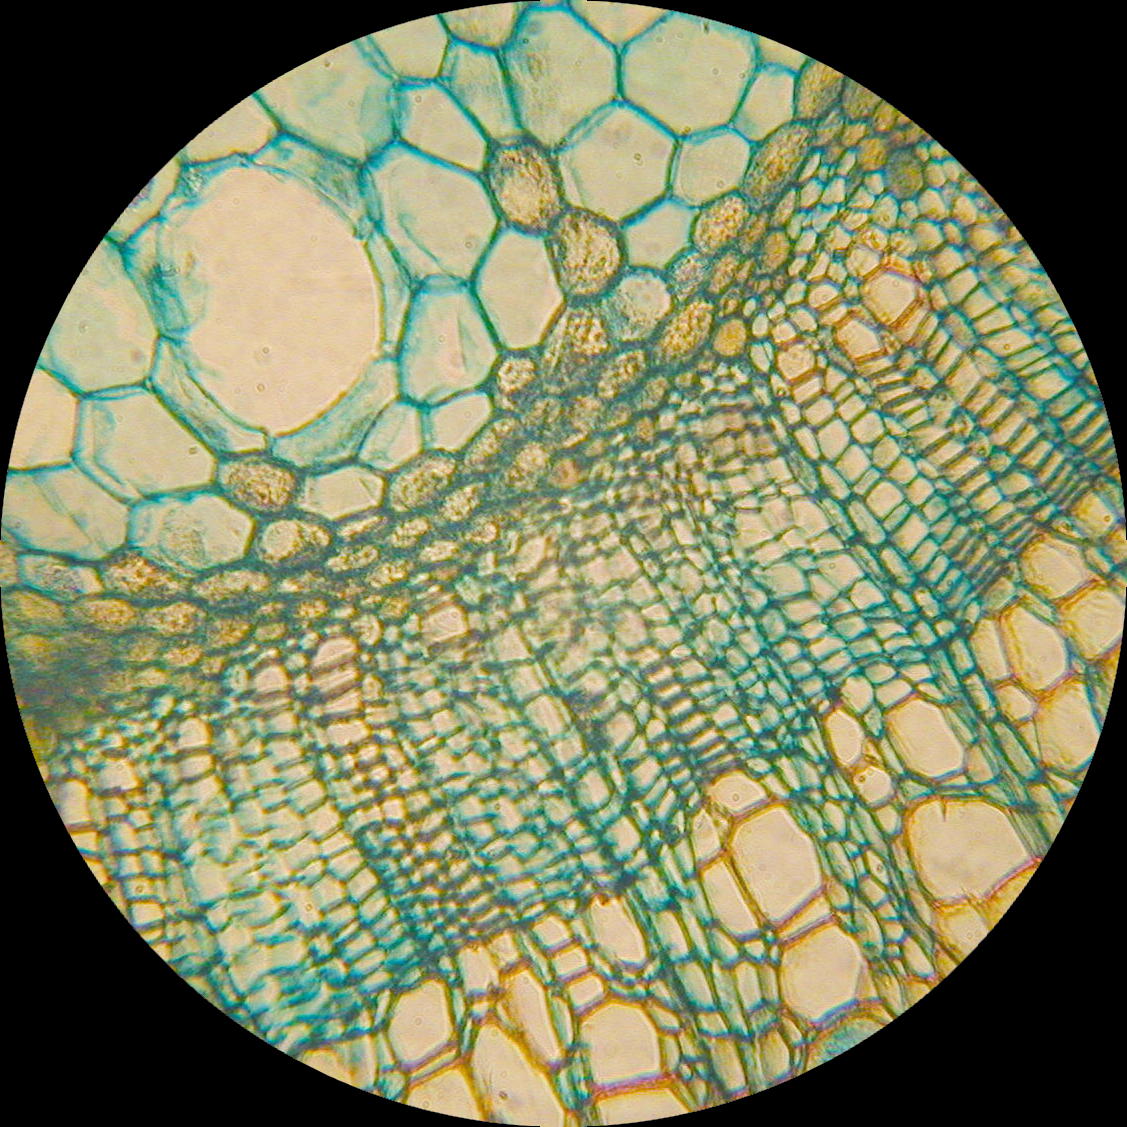
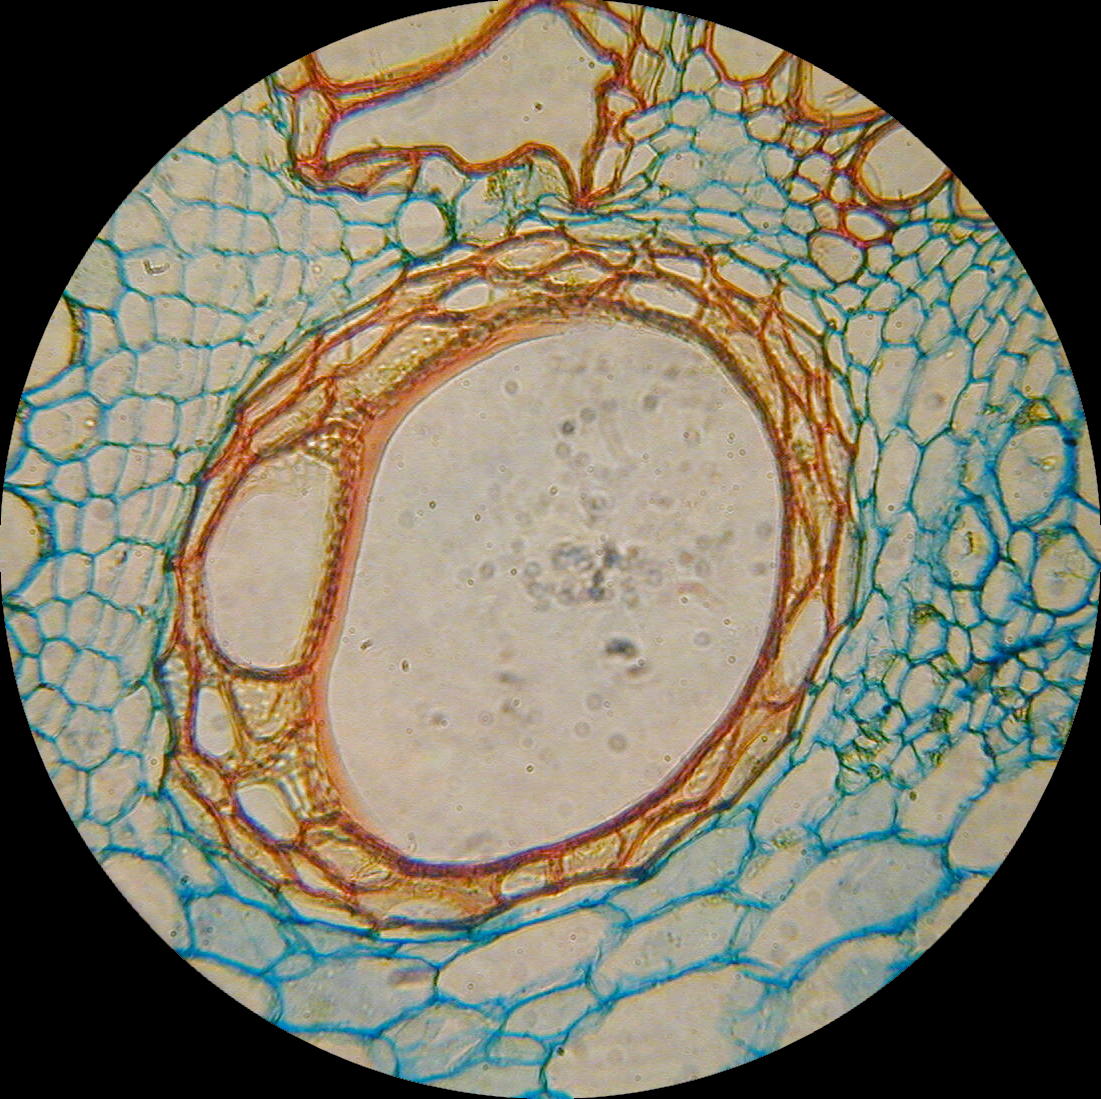
Pumpkin stem, sectioned and stained, 4x objective.
[Click on photo for larger picture]

Pumpkin stem, sectioned and stained, 10x objective.
[Click on photo for larger picture]
Pumpkin stem, sectioned and stained, 40x objective.
[Click on photo for larger picture]
Comparing microscopes
An amateur on a budget will want to know just what an extra few hundred dollars will buy in the way of better photos. Below are some comparison photos, showing the difference between the $100 Labo microscope, and the $700 Celestron. The Labo has no substage illuminator, so the slides were examnined with the concave mirror reflecting a bright cloudy sky onto the slide. The Celestron's illuminator was used, which caused the colors to be bluer than those of the same slide illuminated by bright clouds. All photos were taken with the Camedia 2020 in high resolution mode. Since the actual magnification is a function of the eyepiece, the camera lens, and the settings of your monitor, rather than give a guess at how much the image is magnified, I will instead give the power of the objective lens, which is what determines the resolving power, or the amount of detail that can be seen.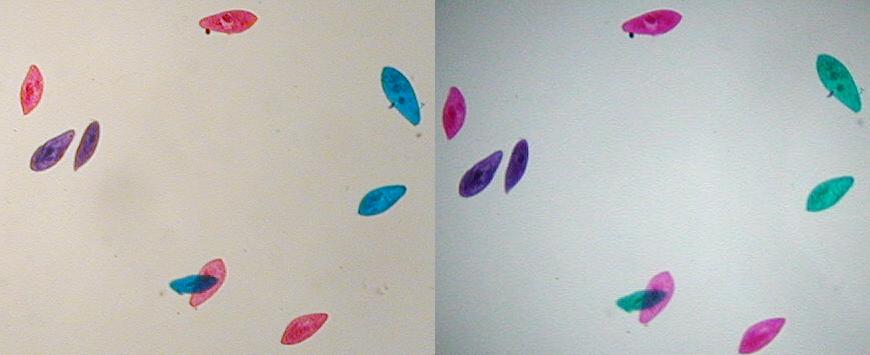
Paramecia stained, 4x objective.
[Click on photo for larger picture] On the left side, the Celestron shows a little more detail, but the difference is actually quite small. For low magnifications, the inexpensive microscope holds its own quite well.

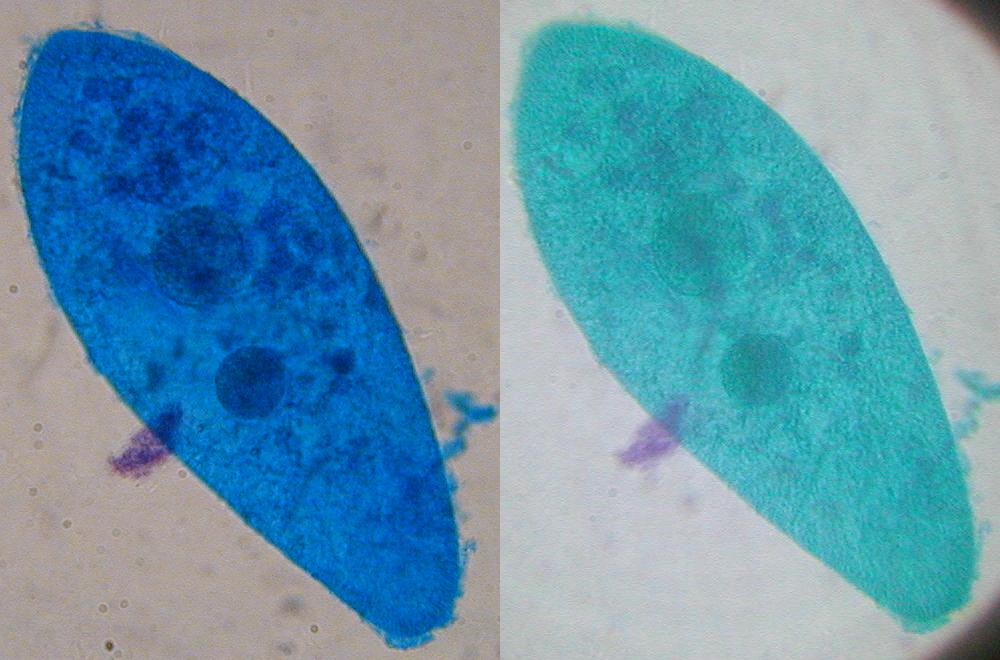
Paramecia stained, 10x objective. At higher magnification, the Celestron (left) shows better contrast and sharper detail.
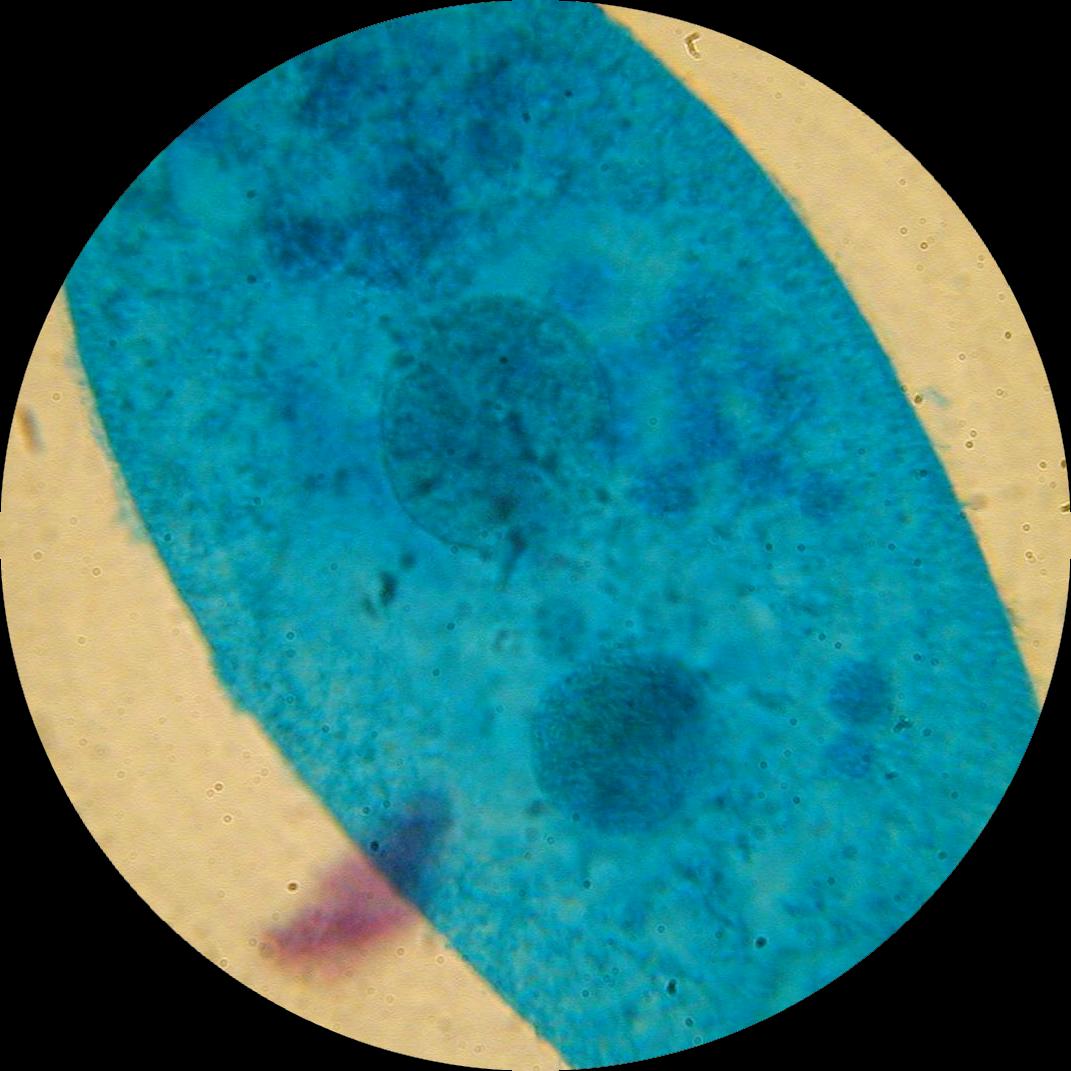
Paramecia stained, 40x objective.
[Click on photo for larger picture] With the 40 power objectives, the value of the substage condenser begins to show. The Celestron shows more detail, and the contrast between the macronucleus and the rest of the cell is higher. However, the inexpensive microscope is still doing an outstanding job with these stained slides. The use of stains to enhance contrast can make up for a lot of missing optical resolution.
Paramecia stained, 100x oil immersion objective.
[Click on photo for larger picture] The Celestron has a 100 power oil immersion objective that the other microscopes lack. At this resolution we can start to see structure in the macronucleus, especially when focusing in and out through the depth of the structures.
Controlling contrast
Most of the work in microscopy is aimed at increasing the contrast between the subject and the background. One of the earliest tricks (probably used by the first microscopist, Antonie van Leeuwenhoek) is dark field illumination. You have used this trick to see small details without a microscope any time you have watched dust motes in a sunbeam. The dust motes are illuminated by bright sunlight, but the dark background is not. The contrast between the bright dust and the dark shadows allows you to see the dust that is normally invisible. There are two main methods for achieving dark field illumination in a microscope. For low powers, where the distance between the objective lens and the subject is relatively large, you can simply aim a strong light down at the subject, and remove any light coming from below. For higher magnifications, where the objective lens is almost touching the subject, this method will not work. What is done instead is to make use of the substage condenser and a small black dot placed between the condenser and the source of light.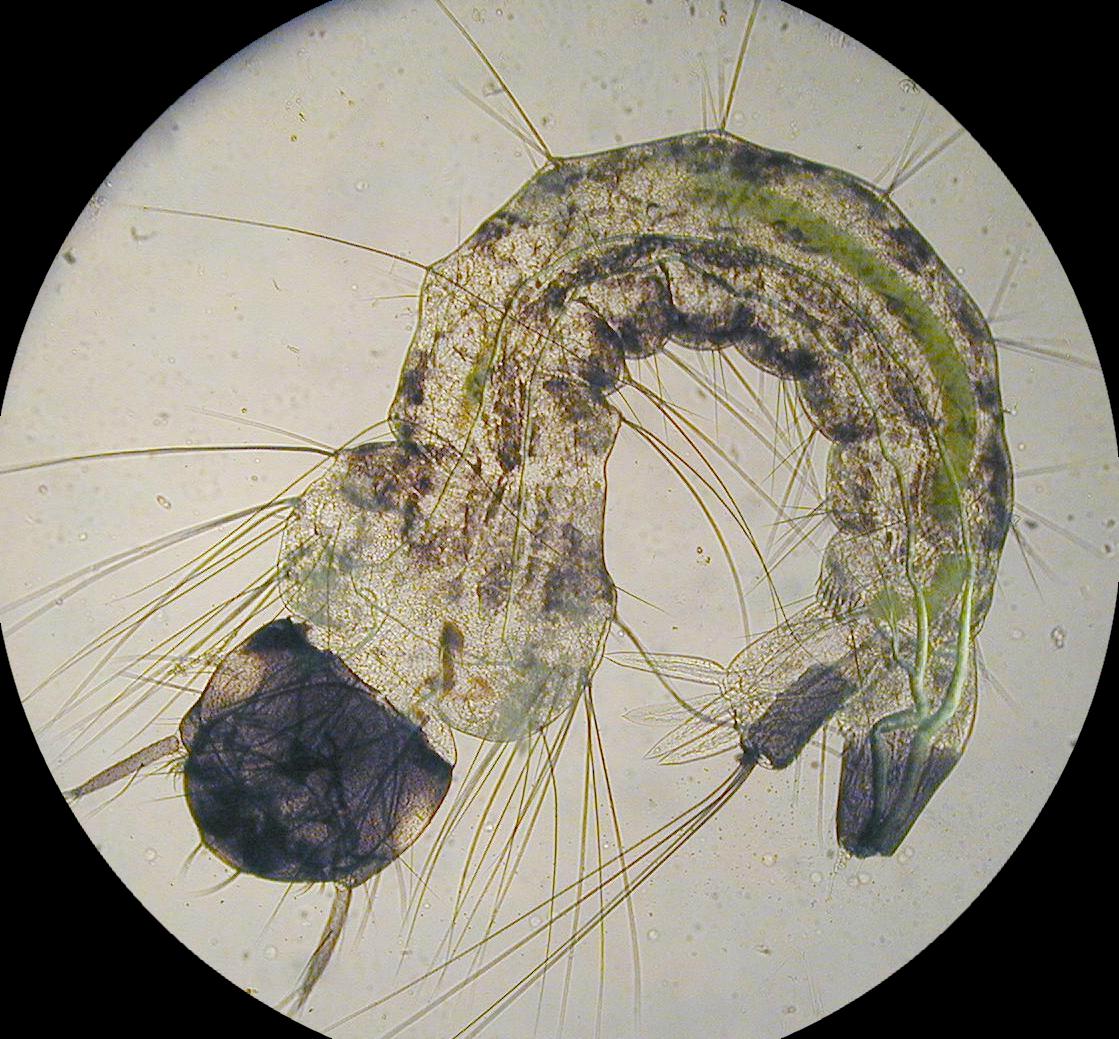
Mosquito larva, bright field illumination.
[Click on photo for larger picture]
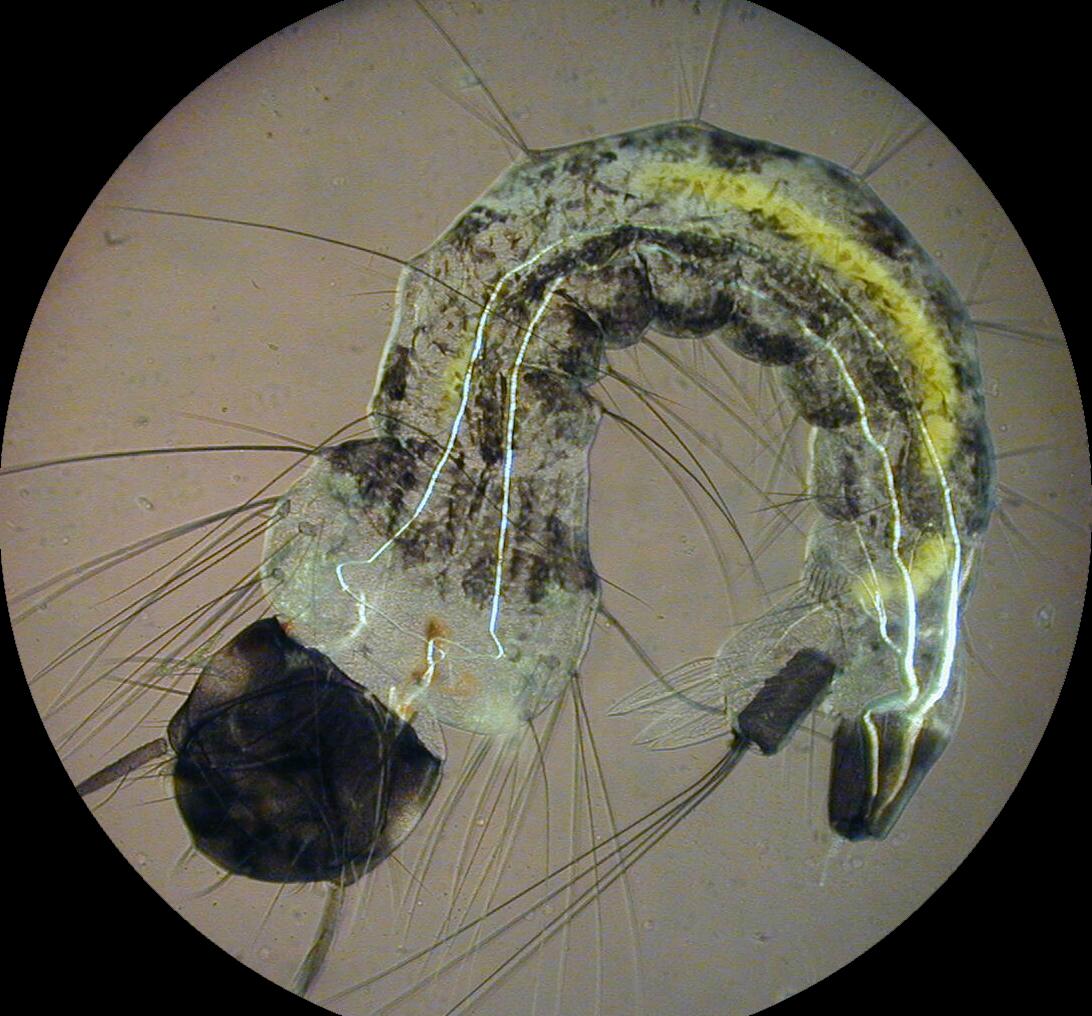
Mosquito larva, dark field illumination.
[Click on photo for larger picture] The condenser projects the image of the black dot onto the objective lens, so the background is dark. However, the light from around the edges of the black dot is focused on the subject, and fine details catch the light and are clearly visible against the dark background.
Video through the microscope
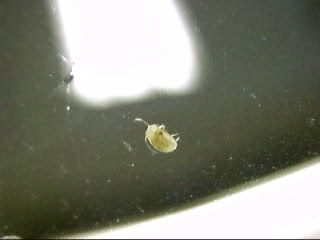
Earlier I had mentioned that the Camedia 2020 and other digital cameras can take videos as well as photographs. Below are a couple of examples. The subjects are ostracods, a tiny crustacean found in freshwater ponds.
[Click on photo for animated view] For more ambitious projects, nothing beats a good digital camcorder. The subject is a microscopic worm (possibly a planarian) and a lot of small ciliates such as paramecia.

[Click on photo for video]
Using a video camera as a microscope.
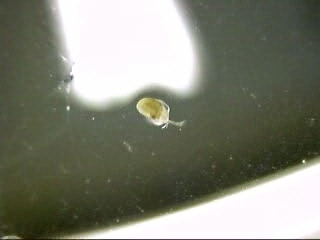
Some cheap computer video cameras have adjustable focus lenses that can focus almost right up to the lens. This allows you to aim the camera straight up, and put a microscope slide on the lens ring, and focus on the slide. Shown below is a Logitech QuickCam camera, facing up, with the microscope slide on top of the lens ring. The video shows the procedure, with a voice-over from the author (me! Hi there!).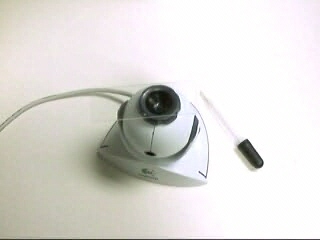
[Click on photo for video] The subject is once again an ostracod (I have a bunch of them I've been keeping as pets in a big jar for almost 2 years now. They eat fish food.)
[Click on photo for video]
[Click on photo for video] For more information on microscopes and photomicrography, see the Recommended Reading section. Next: Listening to Electric Fish Del.icio.us
- Science Toys
- Magnetism
- Electromagnetism
- Electrochemistry
- Radio
- Thermodynamics
- Aerodynamics
- Light and optics
- Simple laser communicator
- Make your own 3D pictures
- Making permanent rainbows.
- A solar powered marshmallow roaster
- Make a spectroscope from a CD.
- The impossible kaleidoscope
- Make a solar hotdog cooker
- Exploring invisible light
- A high resolution spectrograph.
- Time-lapse photography.
- High speed photography.
- Stacking photos for high depth of field.
- Biology
- Mathematics
- Computers and Electronics
Some of my other web sites:

Send mail to Simon Quellen Field via sfield@scitoys.com