- Science Toys
- Magnetism
- Electromagnetism
- Electrochemistry
- Radio
- Thermodynamics
- Aerodynamics
- Light and optics
- Simple laser communicator
- Make your own 3D pictures
- Making permanent rainbows.
- A solar powered marshmallow roaster
- Make a spectroscope from a CD.
- The impossible kaleidoscope
- Make a solar hotdog cooker
- Exploring invisible light
- A high resolution spectrograph.
- Time-lapse photography.
- High speed photography.
- Stacking photos for high depth of field.
- Biology
- Mathematics
- Computers and Electronics
Building a computer controlled radio transmitter
How would you like to send text messages to your friends without wires, and without an Internet connection, and without paying monthly fees? In this project we will build a very simple radio transmitter that you attach to a serial port on your computer. The computer then runs a free program that converts words you type into radio signals that are decoded by another computer, using a cheap radio receiver, and a sound card. With a little study, you don't even need the second computer, since the radio signals are in Morse code, which anyone can learn to decode in their head with a little practice. It also comes in handy as a secret language, or as a way to send long distance messages with a pocket mirror.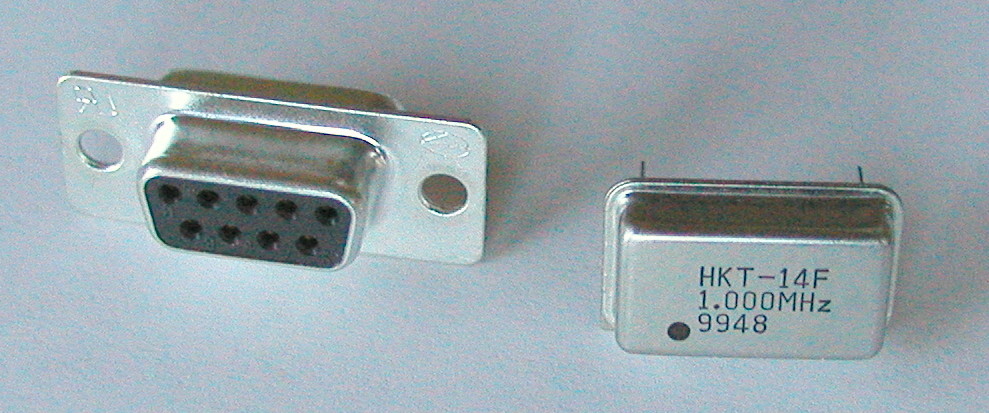
Click on photo for a larger picture
The computer controlled transmitter needs these parts: (We carry most of the necessary parts in our catalog.)
- A one megahertz oscillator
You can use other frequencies if you have a radio that can receive them. We carry this item in our catalog. - A serial port connector
We use a 9 pin RS232 connector. You can take apart an old serial cable, or buy a new connector from an electronics or computer store. We carry this item in our catalog. - Some insulated wire for an antenna
Just about any kind of wire will do, the longer the better. - An alligator test lead
This is a piece of wire with alligator clips at each end. We carry this item in our catalog.
Click on photo for a larger picture
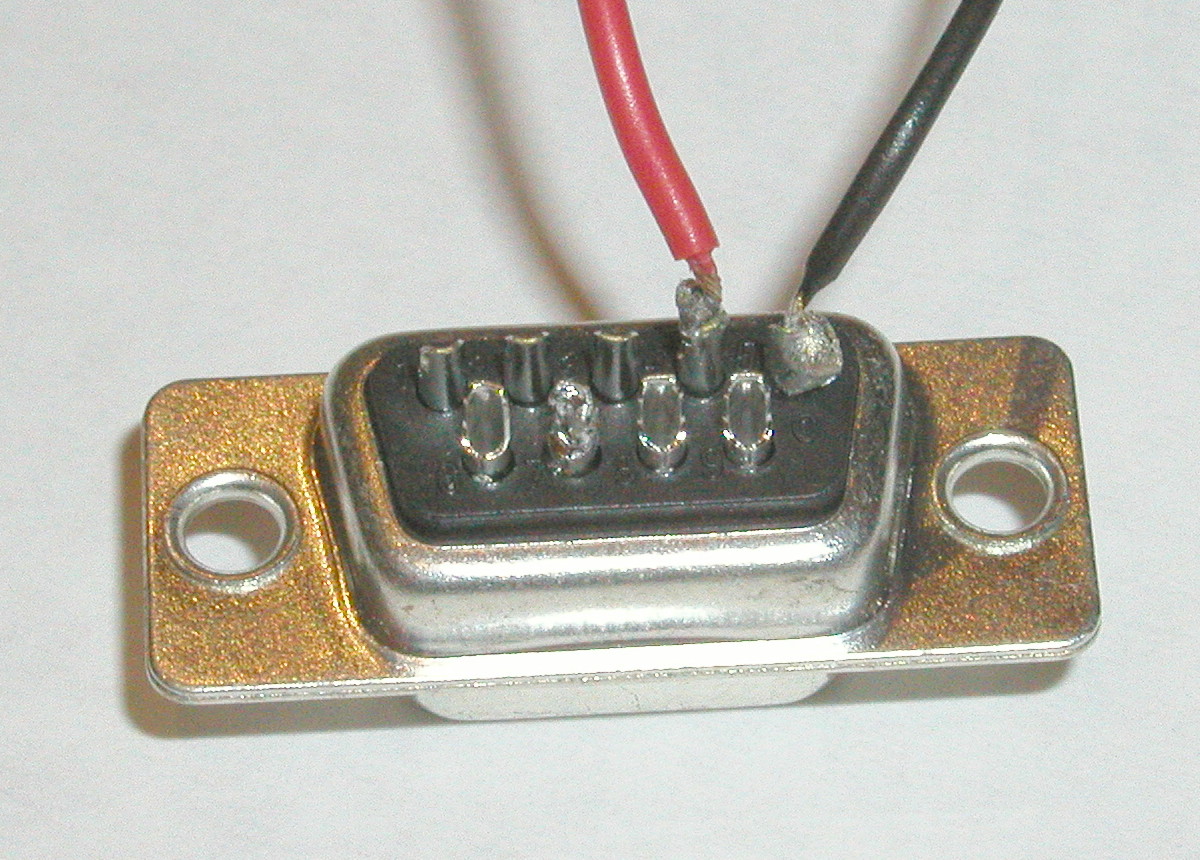
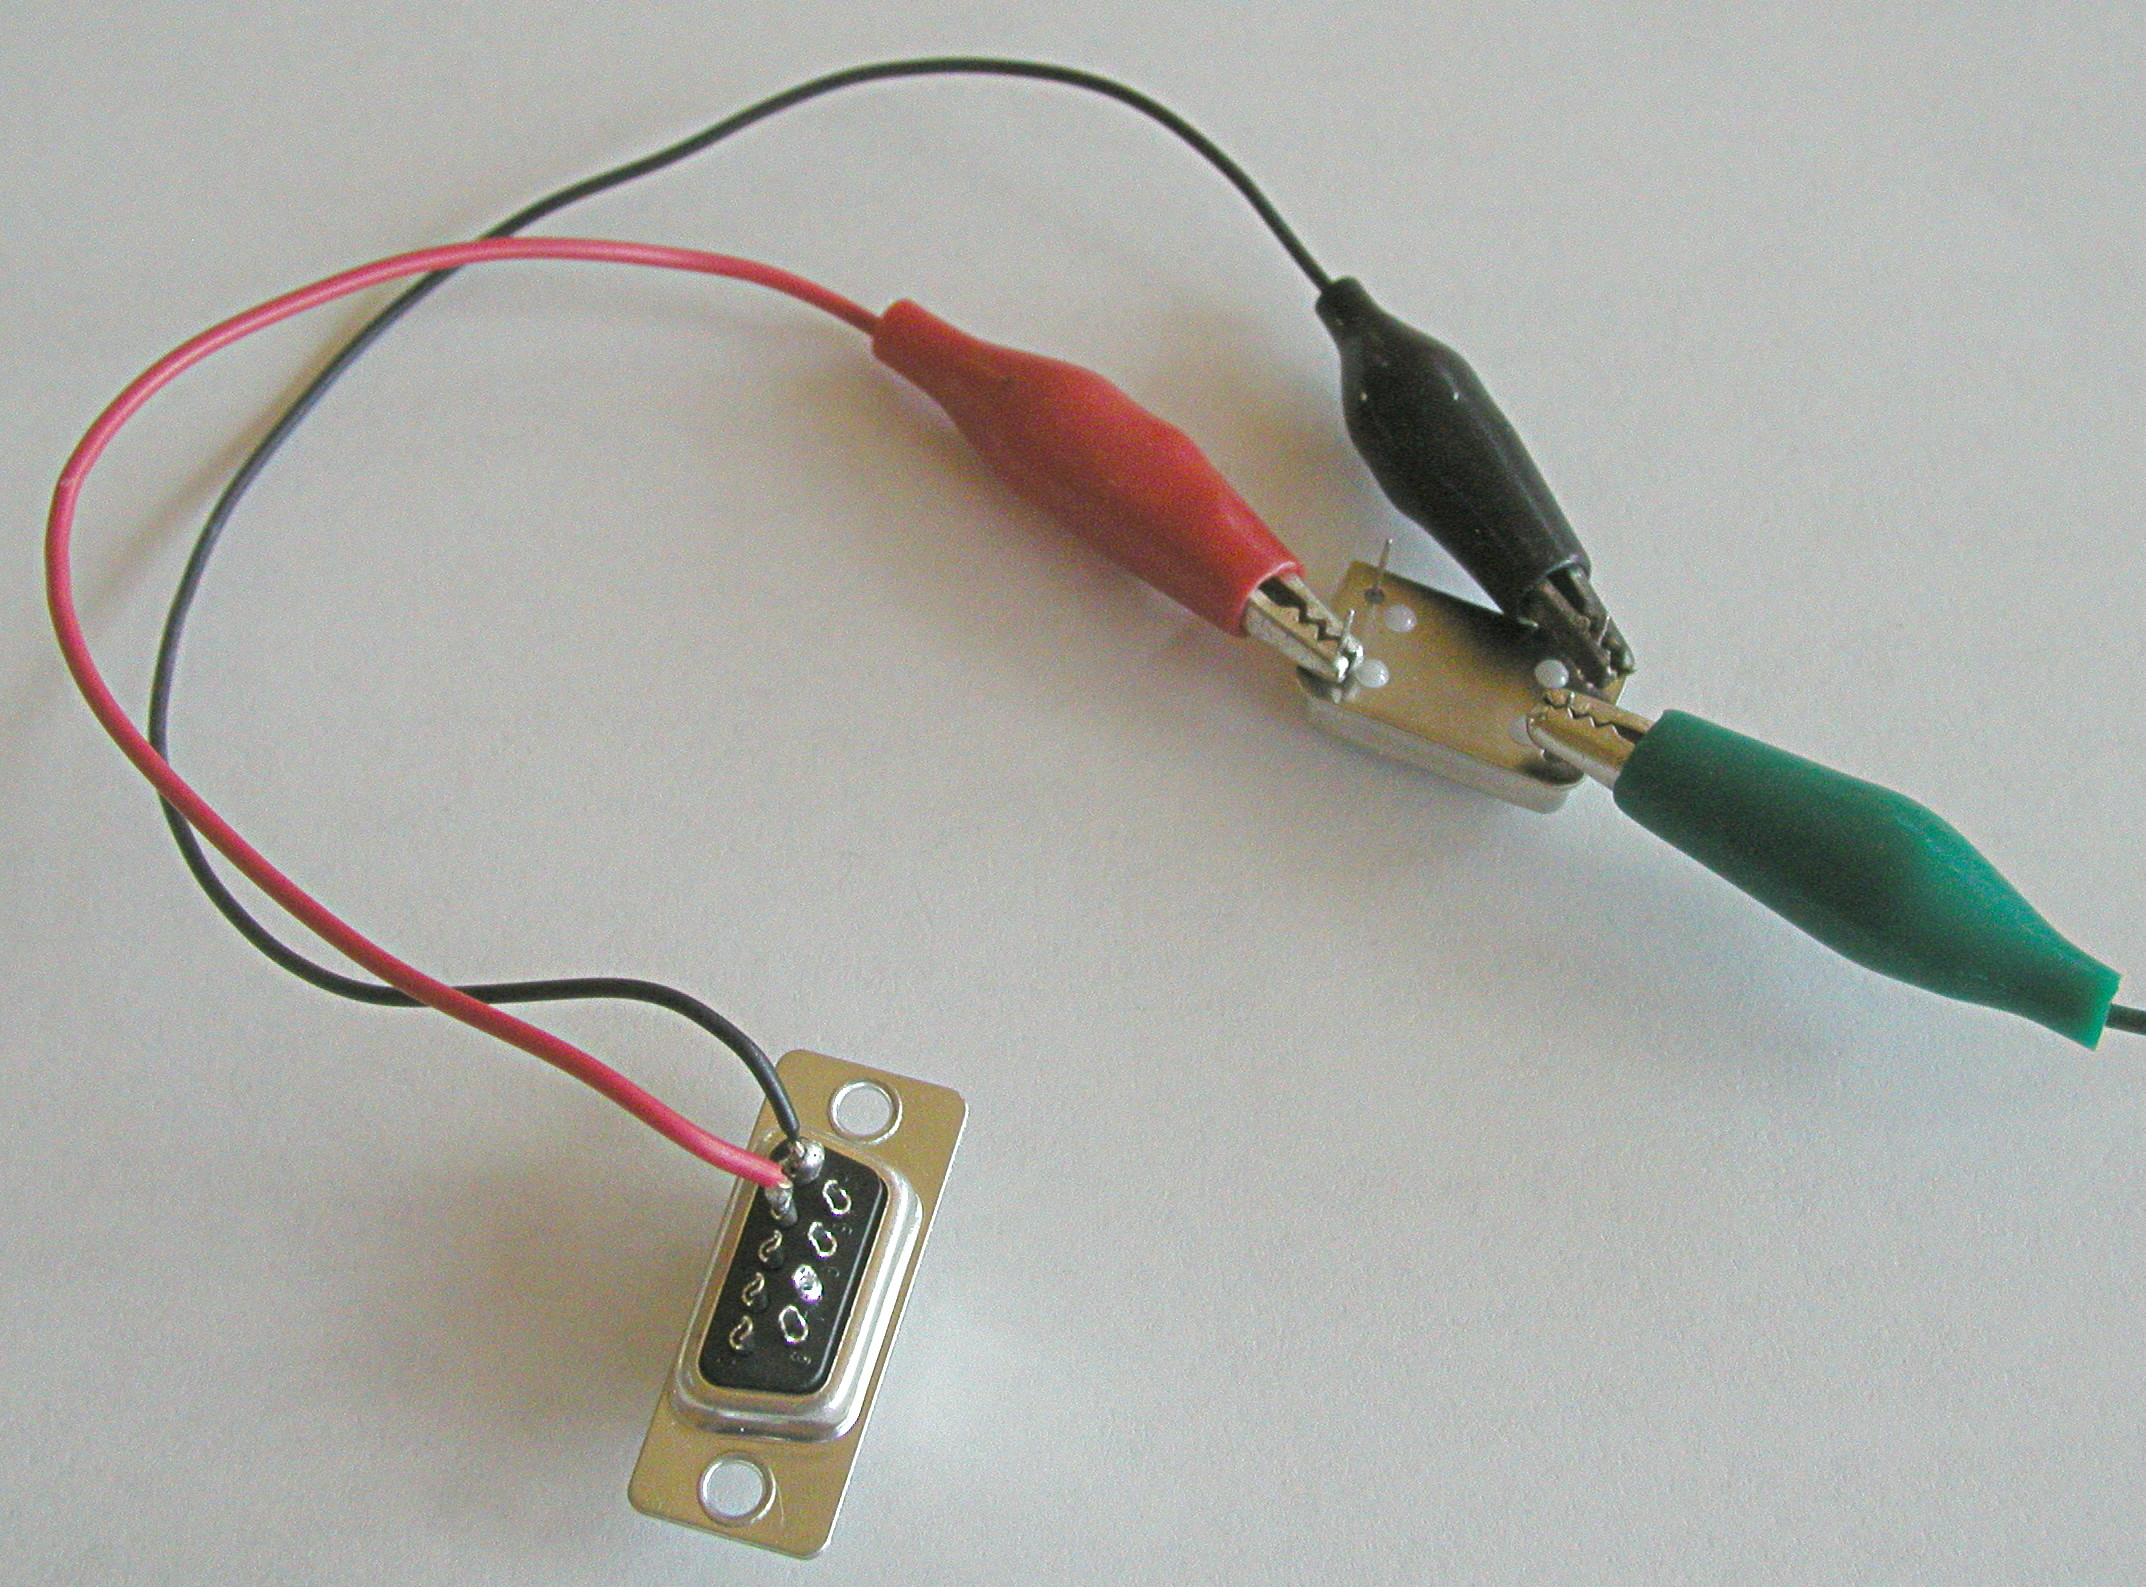
The first step is to cut the test lead in half. In these photos I have cut two test leads, one red and one black, to make it easier to see where the connections go. But unless you are making two transmitters (your friend wants to send messages back, doesn't she?) you can just use one test lead (cut into two pieces). Remove a little insulation from the cut ends of the wire, and solder one of the cut ends to pin 5 and the other to pin 4.
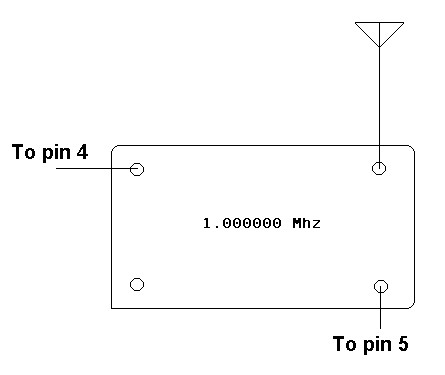 Pin 5 of the serial port connector (the black wire in the photo)
connects to the ground pin of the oscillator. Pin 4 of the serial
port connector goes to the power pin of the oscillator. The drawing
shows the transmitter from the top (pins pointing down). The photo
below shows the oscillator upside down, with the pins facing up.
Pin 5 of the serial port connector (the black wire in the photo)
connects to the ground pin of the oscillator. Pin 4 of the serial
port connector goes to the power pin of the oscillator. The drawing
shows the transmitter from the top (pins pointing down). The photo
below shows the oscillator upside down, with the pins facing up.
Click on photo for a larger picture
The green alligator clip attaches to the antenna, which can be any long wire. It is attached to the output pin of the oscillator. The remaining pin of the oscillator (the one nearest the sharp corner) is not used. Your Computer Controlled Transmitter is now complete!
Controlling the transmitter
To send a message, we now need a computer program that can convert what we type into Morse code, and turn the oscillator on and off in the short and long pulses (dots and dashes) that are required. A program to do that (for the Windows operating system) can be downloaded by clicking here. Save the ZIP file on your computer, use a ZIP file decompressor to unpack it, and then double-click on the resulting MorseCode.exe to start running it.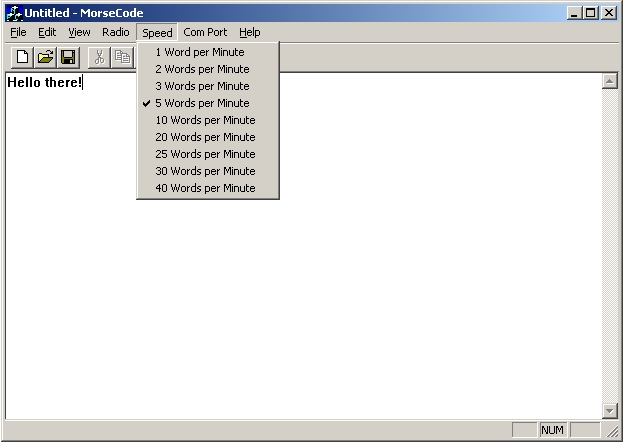 You can select how fast the message is sent by using the Speed
menu.
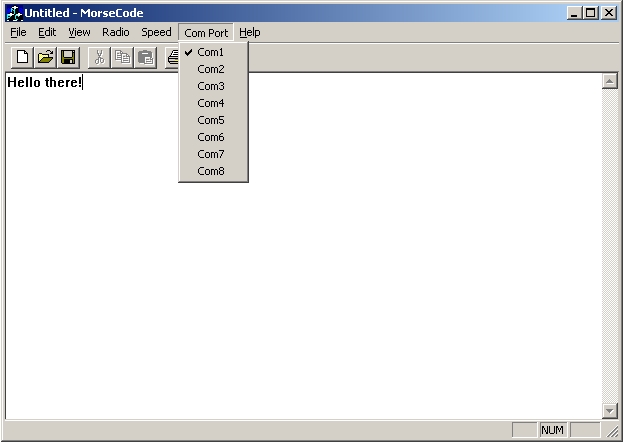
You can control which serial port to use through the Com Port
menu.
You can select how fast the message is sent by using the Speed
menu.
You can control which serial port to use through the Com Port
menu.
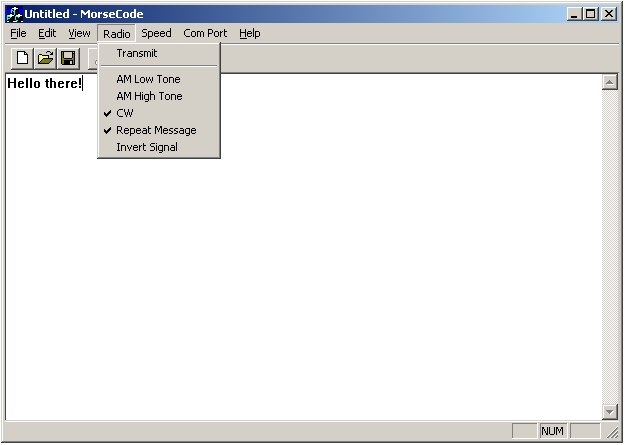
 The Radio menu has three selections we have not discussed yet.
The AM Low Tone selection sets the tone you hear in the AM radio
to 500 hertz. The AM High Tone selection sets the tone to 1,000
hertz. The CW selection is only for short-wave radios that have an SSB
or CW mode. This selection does not modulate the radio signal, so an
AM radio will just hear clicks. This selection allows the signal to be
heard farther away, but requires a more expensive short-wave receiver.
I have used the
radio with great success. It usually sells for about $150.00.
The Radio menu has three selections we have not discussed yet.
The AM Low Tone selection sets the tone you hear in the AM radio
to 500 hertz. The AM High Tone selection sets the tone to 1,000
hertz. The CW selection is only for short-wave radios that have an SSB
or CW mode. This selection does not modulate the radio signal, so an
AM radio will just hear clicks. This selection allows the signal to be
heard farther away, but requires a more expensive short-wave receiver.
I have used the
radio with great success. It usually sells for about $150.00.
 If you are a computer programmer, and would like to look at the source
code for this program, you can download it
here. There is also a much simpler, command-line
version of the program
here.
If you are a computer programmer, and would like to look at the source
code for this program, you can download it
here. There is also a much simpler, command-line
version of the program
here.
Receiving the code with a computer
Until you have learned to decipher Morse code in your head, you will want to have a computer do it for you. There are many free programs floating around the Web that will do this for you. One such program can be downloaded here. I won't go into its operation (since I didn't write it), but it has a Help menu, and it is fairly straightforward to use. You will need an audio cable to connect the radio's earphone jack to the computer's sound card input jack, but that is all the hardware required.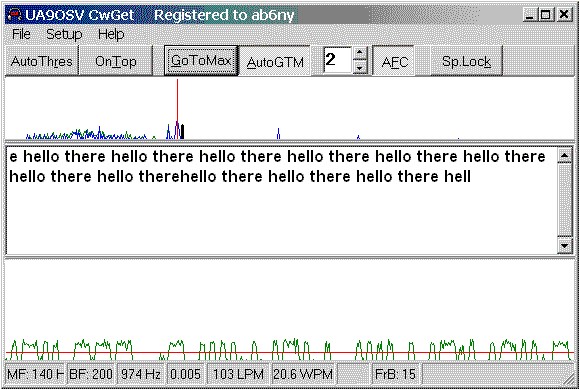 You can see it working in the screen shot above, decoding our endless
loop of "hello there".
You can see it working in the screen shot above, decoding our endless
loop of "hello there".
How does it do that?
Most of the important concepts for this project have been covered in other sections of this chapter. The computer provides power to the oscillator through the DTR pin of the serial port. The program turns the DTR signal on and off, which causes the oscillator to turn on and off in return. To make the signal audible in a cheap AM radio, the computer turns the power to the oscillator on and off 1,000 times per second while sending the dots and dashes of the code, and leaves it off in between the dots or dashes. This modulates the radio signal at a frequency your ears can hear. In AM Low Tone the audio frequency is 500 times per second. In the CW mode (CW stands for Continuous Wave), the computer does not modulate the radio signal. It just turns on the oscillator long enough for the dot or dash to be sent. In this case, the receiver does the work of converting the signal into an audible tone your ears can hear, by using a circuit called a beat frequency oscillator. Your short-wave radio may have a switch labelled BFO, or SSB, or CW that allows this circuit to operate.Some nicer packaging
The computer program turns on DTR and also another signal called RTS, while sending the dots and dashes. In the version of the transmitter shown below, we have mounted a 14 pin socket to a general purpose circuit board from Radio Shack, and plugged the oscillator into that. A blue light emitting diode is connected to the RTS pin of the serial port connector (pin 7). The LED flashes Morse code along with the oscillator, making an eye-catching project.
Click on photo for a larger picture
The serial port connector is wedged onto the printed circuit board by placing the board between the pins.

Click on photo for a larger picture
The wires that connect the serial port connector to the oscillator and the LED also serve to hold the connector onto the printed circuit board. The antenna in this case is a 6 inch long wire. In CW mode, this wire is all that is needed to receive the signal anywhere in the house. A longer antenna will allow the whole block to receive the signal. By replacing the 1 megahertz oscillator with a 28.322 megahertz oscillator, and connecting the transmitter to a large amateur radio antenna (10 meter beam), I was able to send signals from California to Texas. To do that, you will want to get an amateur radio license.
Learning Morse Code
There are many free programs for helping you learn to decipher morse code in your head. Some of them are: cw_play, MorseMad, NuMorse, and MorseCat. For more information on radio, see the Recommended Reading section. Next: A Free Space Laser Data Transmitter Del.icio.us- Science Toys
- Magnetism
- Electromagnetism
- Electrochemistry
- Radio
- Thermodynamics
- Aerodynamics
- Light and optics
- Simple laser communicator
- Make your own 3D pictures
- Making permanent rainbows.
- A solar powered marshmallow roaster
- Make a spectroscope from a CD.
- The impossible kaleidoscope
- Make a solar hotdog cooker
- Exploring invisible light
- A high resolution spectrograph.
- Time-lapse photography.
- High speed photography.
- Stacking photos for high depth of field.
- Biology
- Mathematics
- Computers and Electronics
Some of my other web sites:

Send mail to Simon Quellen Field via sfield@scitoys.com