- Science Toys
- Magnetism
- Electromagnetism
- Electrochemistry
- Radio
- Thermodynamics
- Aerodynamics
- Light and optics
- Simple laser communicator
- Make your own 3D pictures
- Making permanent rainbows.
- A solar powered marshmallow roaster
- Make a spectroscope from a CD.
- The impossible kaleidoscope
- Make a solar hotdog cooker
- Exploring invisible light
- A high resolution spectrograph.
- Time-lapse photography.
- High speed photography.
- Stacking photos for high depth of field.
- Biology
- Mathematics
- Computers and Electronics
A 10 minute railgun
A railgun is a device for accelerating an object by running electric current through it along a pair of rails. When large amounts of power are used, the railgun becomes a potent weapon. But the principles can be demonstrated safely by using a smaller amount of power, in our case, from a 9 volt battery. When a small amount of power is used, the rails can be re-used many times. If larger amounts of power are used, the railgun becomes a one-shot device, as the rails are destroyed in the process of shooting the gun, due to arcing and flexing of the rails. There are several types of rail gun, each with a different method of accelerating the object. This version is called a linear homopolar motor.
Click on image for an animated picture
What you need
- A piece of cardboard or wood for a base. It can be any length. Ours is about 18 inches long, and about 6 inches wide.
- Two strips of aluminum foil, 2 inches wide, and 2 inches longer than the base.
- A 2 inch wide length of steel wire, such as from a coathanger.
- 2 disc magnets, plated in a good conductor, such as gold. The super-powerful magnets in our catalog work great, and were the ones used in this project.
- Some white glue
- A 9 volt battery
- Two aligator clip leads
Click on image for a larger picture We start by spreading a thin layer of glue on the base, to hold down the foil strips.
Click on image for a larger picture The foil strips are then placed on the base, about a half inch apart, and smoothed down with fingers to remove wrinkles. The extra 2 inches is left hanging over one side, to make it easy to clip on the leads for the battery.
Click on image for a larger picture Next we attach the battery with the clip leads. We won't worry about battery polarity at this time -- if the gun shoots the wrong way, we will reverse the battery.
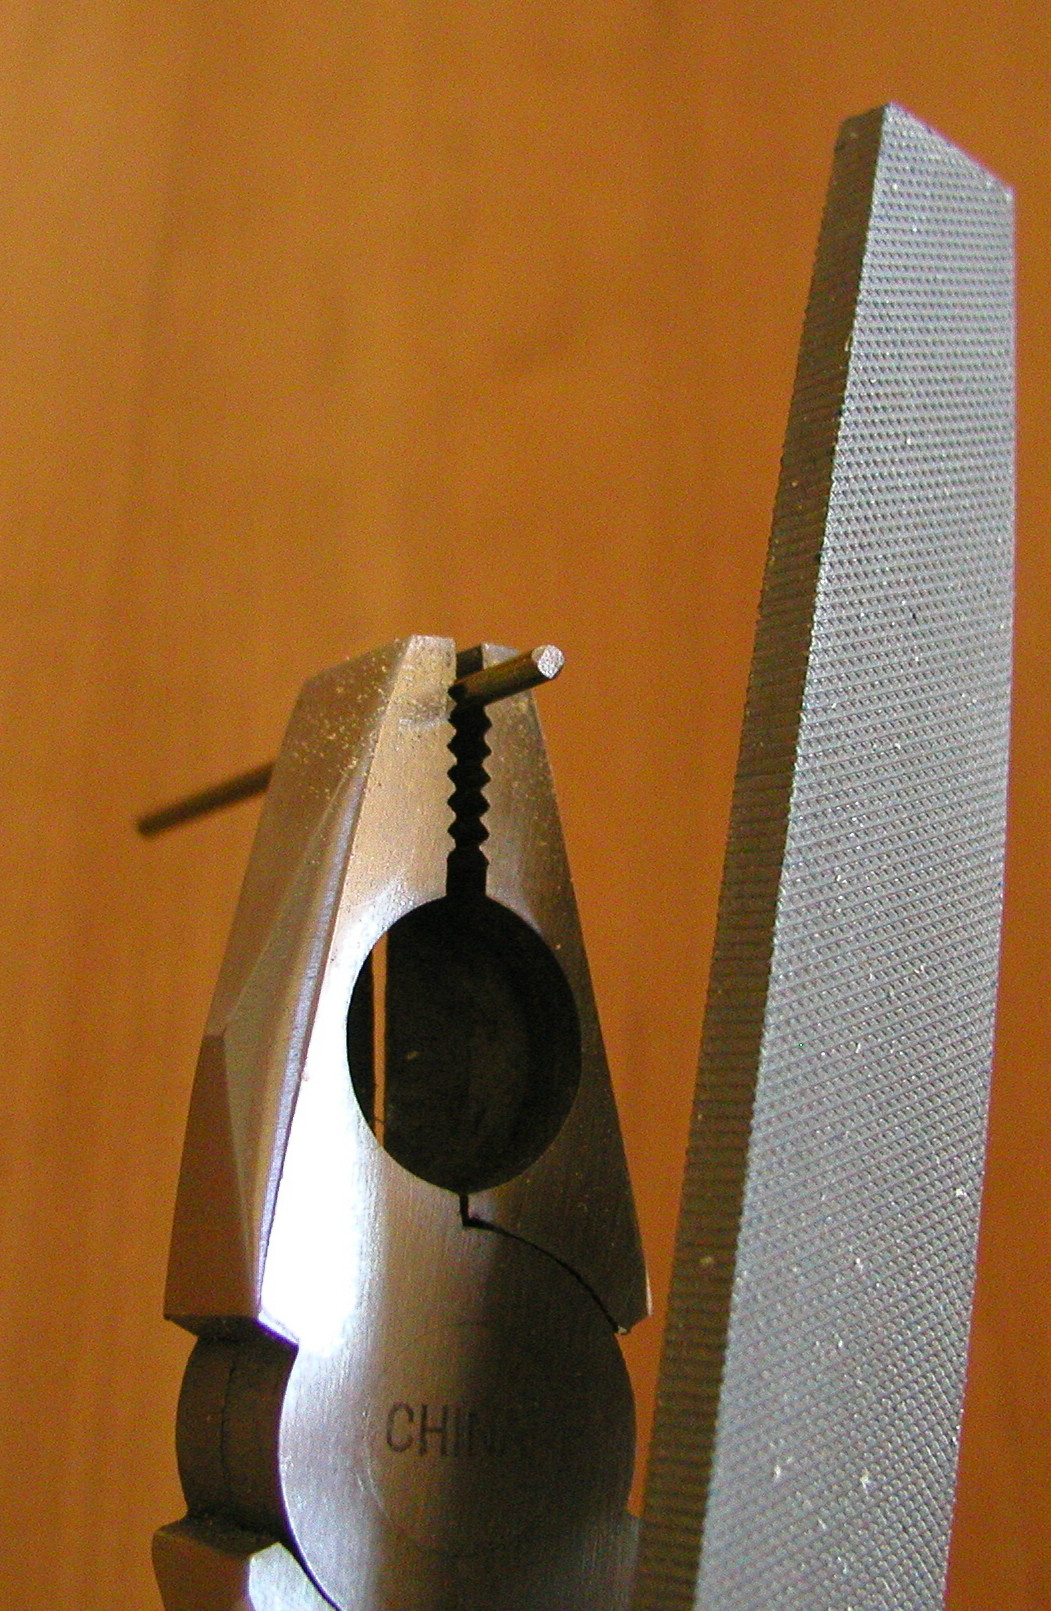
Click on image for a larger picture The nest step is to file the ends of the coathanger wire flat. This will allow the magnets to stick flat to the ends of the wire axle. If the filing is done carefully to make the flat ends perpendicular to the wire, then there will be less wobbling as the magnets travel down the rails.
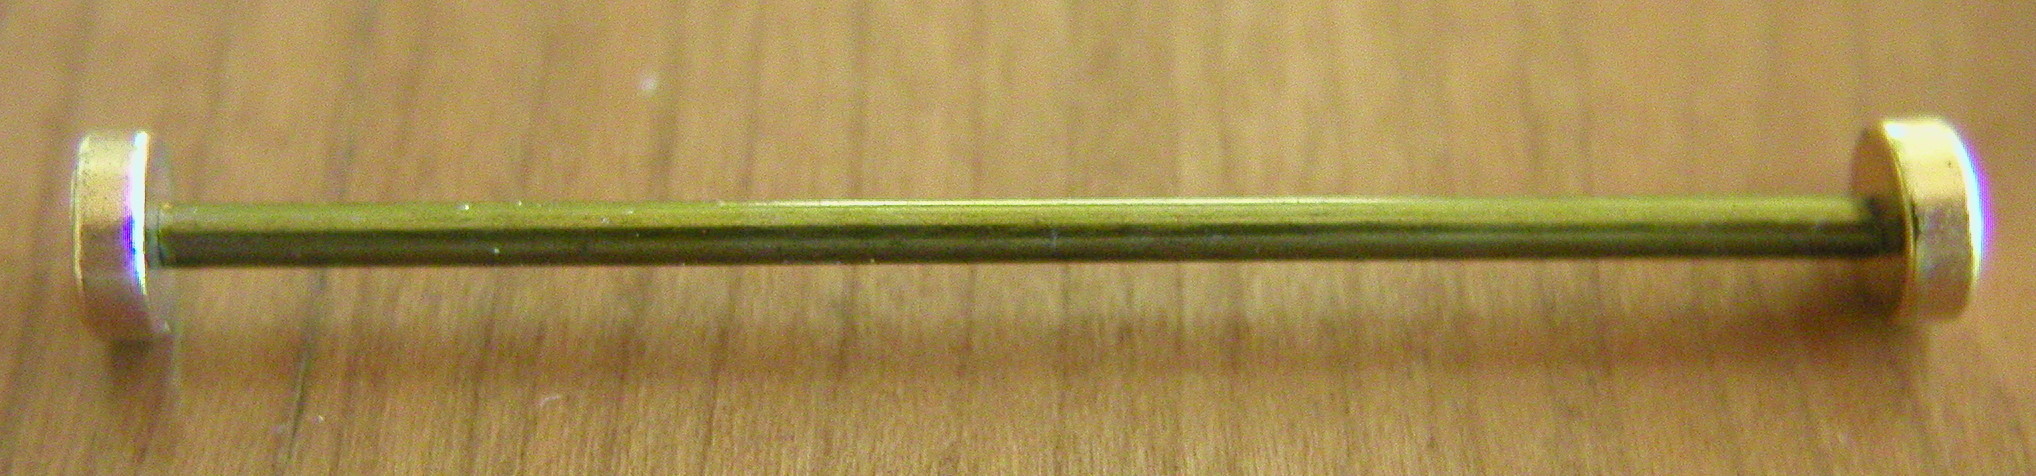
Click on image for a larger picture Now the magnets are placed on either end of the wire axle. The magnets should have their poles facing in opposite directions. The magnets repel one another when aligned this way, but will still stick firmly to the steel axle. No glue is necessary, as the magnets are very strong.
Firing the railgun
To fire the railgun, just drop the wheels on the rails. They will start to accelerate immediately. If they don't move at all, the magnets are probably not pointing the same way. Lift the wheels, and flip one magnet, and try again. If it still doesn't work, check the battery and the connections. If the wheels move in the wrong direction, you can either start them at the other end, or reverse the battery. Click on the photo below to see the railgun in action.Click on image for an animated picture
How does it do that?
The homopolar motor was one of the first motors ever built. Michael Faraday built one. There are many different designs. The one shown below is only one of them. Click on the picture to see it run.
Click on image for an animated picture A magnet is placed north pole facing up in a bowl of vinegar. The magnet is one of our super-powerful ones from our catalog. Suspended over it is a heavy piece of copper tube or wire, hanging from a flexible stranded wire alligator clip. The vinegar covers the tube to a depth of about a half of an inch. The tube does not quite touch the magnet, but is free to swing around. A piece of aluminum foil also rests in the vinegar (this can be a copper wire instead, it is not critical). When we connect a source of about 30 to 50 volts (some 9 volt batteries connected in series) to the foil and the tube, the tube starts to revolve around the magnet. We also get lots of bubbles of hydrogen and oxygen, but for this project that is just a side effect. We have created a homopolar motor. Unlike our previous motors, this one does not change the poles of an electromagnet from north to south and back. As the current flows through the copper wire (or tube in our case), a magnetic field is created around it. This magnetic field interacts with the magnetic field of the magnet at the bottom of the bowl. The arrangement is set up so that the magnetic field in the wire exerts its force at a right angle to the magnetic field of the bottom magnet. This makes the wire circle that magnet. Another simple homopolar motor is shown below.
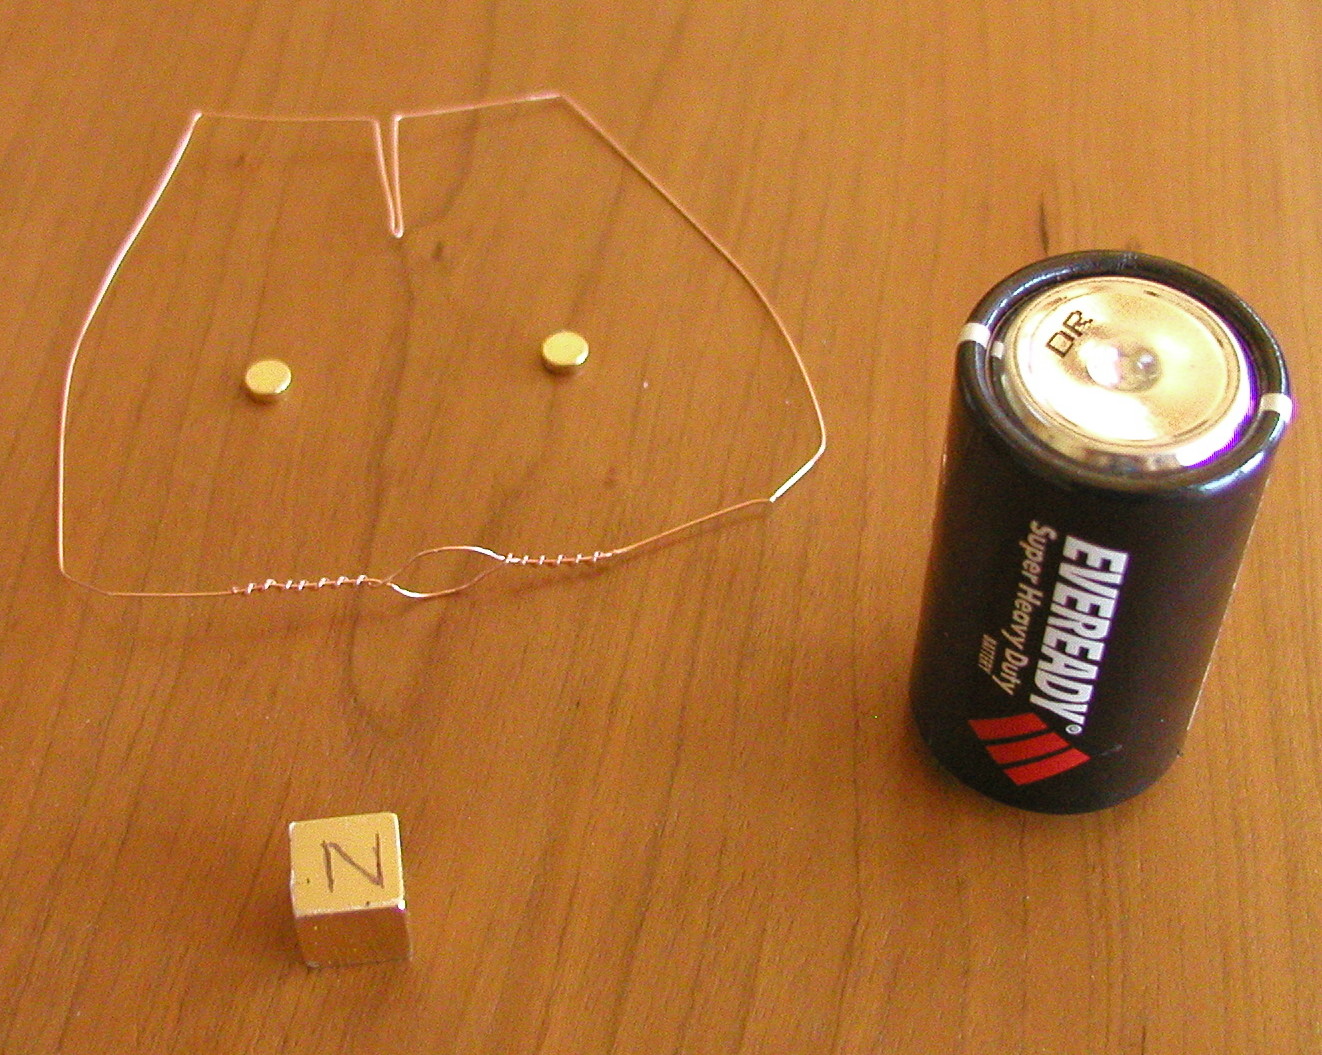
Click on image for a larger picture The photo above shows the parts before assembly. There are three magnets -- two small disks, and one cube whose north pole we have marked with an "N". The magnets are from our catalog. There is a D cell battery, and a bare copper wire we have formed into a shape whose form will make sense shortly.
Click on image for an animated picture The two small disk magnets are set on top of the North pole of the cube magnet. The loop in the bottom of the wire form is then placed in top of the two disks. The loop is just barely larger than the disks. The positive pole of the battery is then carefully placed on top of the disks, and the pointed end of the wire form is placed in the dimple at the top of the battery. When the whole structure is balanced on the cube magnet, the wire begins spinning around the battery. What is going on here is similar to what is going on in our vinegar version. The current from the battery is flowing through the wire on both sides of the wire form. This creates a magnetic field around the wire. This field interacts with the field from the cube magnet and the disks. The wire's field creates a force at right angles to the field from the magnets. This causes the right side of the wire to be pushed towards you, and the left side to be pushed away from you. This action continues until the battery runs down. Suppose we held onto the wire, and let the magnet move? We can do that by simply setting the battery on the table, on its side. Click on the photo to see an animation of what happens.
Click on image for an animated picture The wire rotates until it hits the table. The force continues after the wire can no longer rotate, and so instead of the wire rotating, the battery and the magnets rotate. This makes the battery roll along the table like a steam roller. You can now see that we are very close to our railgun design. The railgun is really just two of these battery rollers connected end-to-end. The battery is now external, and the wires have been replaced by the rails. The magnetic field in the rails creates a force at right angles to the magnetic field of the railgun trolley's wheels, and causes them to roll. Next: A 30 second homopolar motor Order super magnets here. Del.icio.us
- Science Toys
- Magnetism
- Electromagnetism
- Electrochemistry
- Radio
- Thermodynamics
- Aerodynamics
- Light and optics
- Simple laser communicator
- Make your own 3D pictures
- Making permanent rainbows.
- A solar powered marshmallow roaster
- Make a spectroscope from a CD.
- The impossible kaleidoscope
- Make a solar hotdog cooker
- Exploring invisible light
- A high resolution spectrograph.
- Time-lapse photography.
- High speed photography.
- Stacking photos for high depth of field.
- Biology
- Mathematics
- Computers and Electronics
Some of my other web sites:

Send mail to Simon Quellen Field via sfield@scitoys.com